


Design a Blanket with Photos: A Complete Guide for Holiday Gifting
Ready to turn your favorite memories into a cozy keepsake? Designing a custom photo blanket is a deeply rewarding way to bring your photos to life. It’s perfect for a holiday gift in December, a Mother’s Day surprise in May, or just a little something for yourself.
The whole process is much simpler than you might think when you break it down. It all starts with picking the right photos—the foundation of your entire design. From there, we'll get into the fun stuff, like choosing a soft material and arranging your pictures into a layout that tells your story. This guide will walk you through everything, making sure you feel confident from start to finish.
A well-designed photo blanket is so much more than a cozy throw; it’s a woven collection of memories. The most impactful designs often come from a thoughtful selection of images that share a common theme, like a family vacation, a wedding, or a baby's first year.
The Core Steps of Blanket Design
Let's dive into the first few steps. These early decisions set the tone for your final blanket, so getting them right is key. We'll focus on nailing the photo quality, picking the best material for your needs, and planning a layout that looks fantastic. Each choice builds on the last, bringing your creative vision to life piece by piece.
Taking a moment to plan these fundamentals helps you sidestep common pitfalls like blurry images or awkward layouts. The goal is to create a blanket you'll be proud to show off.
Before we get into the details, here's a quick look at the essential steps for designing your photo blanket. This table sums up what you need to focus on to get started on the right foot.
Photo Blanket Design Quick-Start Guide
| Step | Key Consideration | Pro Tip |
|---|---|---|
| 1. Select Your Photos | Choose high-resolution images to avoid a blurry or pixelated result. | Use original files from your camera or phone, not compressed versions from social media. |
| 2. Choose a Material | Decide between soft fleece for vibrant colors or cozy sherpa for extra warmth. | Think about the blanket’s main use—is it a decorative throw or a warm bed cover? |
| 3. Plan Your Layout | Arrange photos in a single-image showcase or a dynamic collage. | Group photos by color or theme to create a cohesive and visually pleasing design. |
With these core steps in mind, you’re well on your way to creating a beautiful, personalized blanket that’s full of heart.
Choosing the Best Blanket Material
When you're ready to design a blanket with photos, the material you pick is the very foundation of your project. It's what determines how the blanket feels, how vibrant your pictures look, and how well it holds up over time. This isn't just a small detail—it's a crucial step that shapes the final quality and purpose of your custom keepsake.
The market for Custom Photo Blankets has seen incredible growth, which really highlights how much people love these personalized items. Projections show the market jumping from $0.8 billion in 2025 to $1.4 billion by 2033, a clear sign that the demand for meaningful gifts is on the rise. This boom is powered by a variety of materials, including fleece, sherpa, and cotton, each offering its own unique feel for different uses.
Comparing Popular Fabric Choices
Every material brings something different to the table. Getting to know these differences is key to making a choice that fits your vision, whether you're creating a light, decorative throw or a thick, cozy covering for chilly nights. Let’s break down the most common options to help you decide.
This chart gives you a quick visual comparison of softness, warmth, and print clarity for three popular materials.
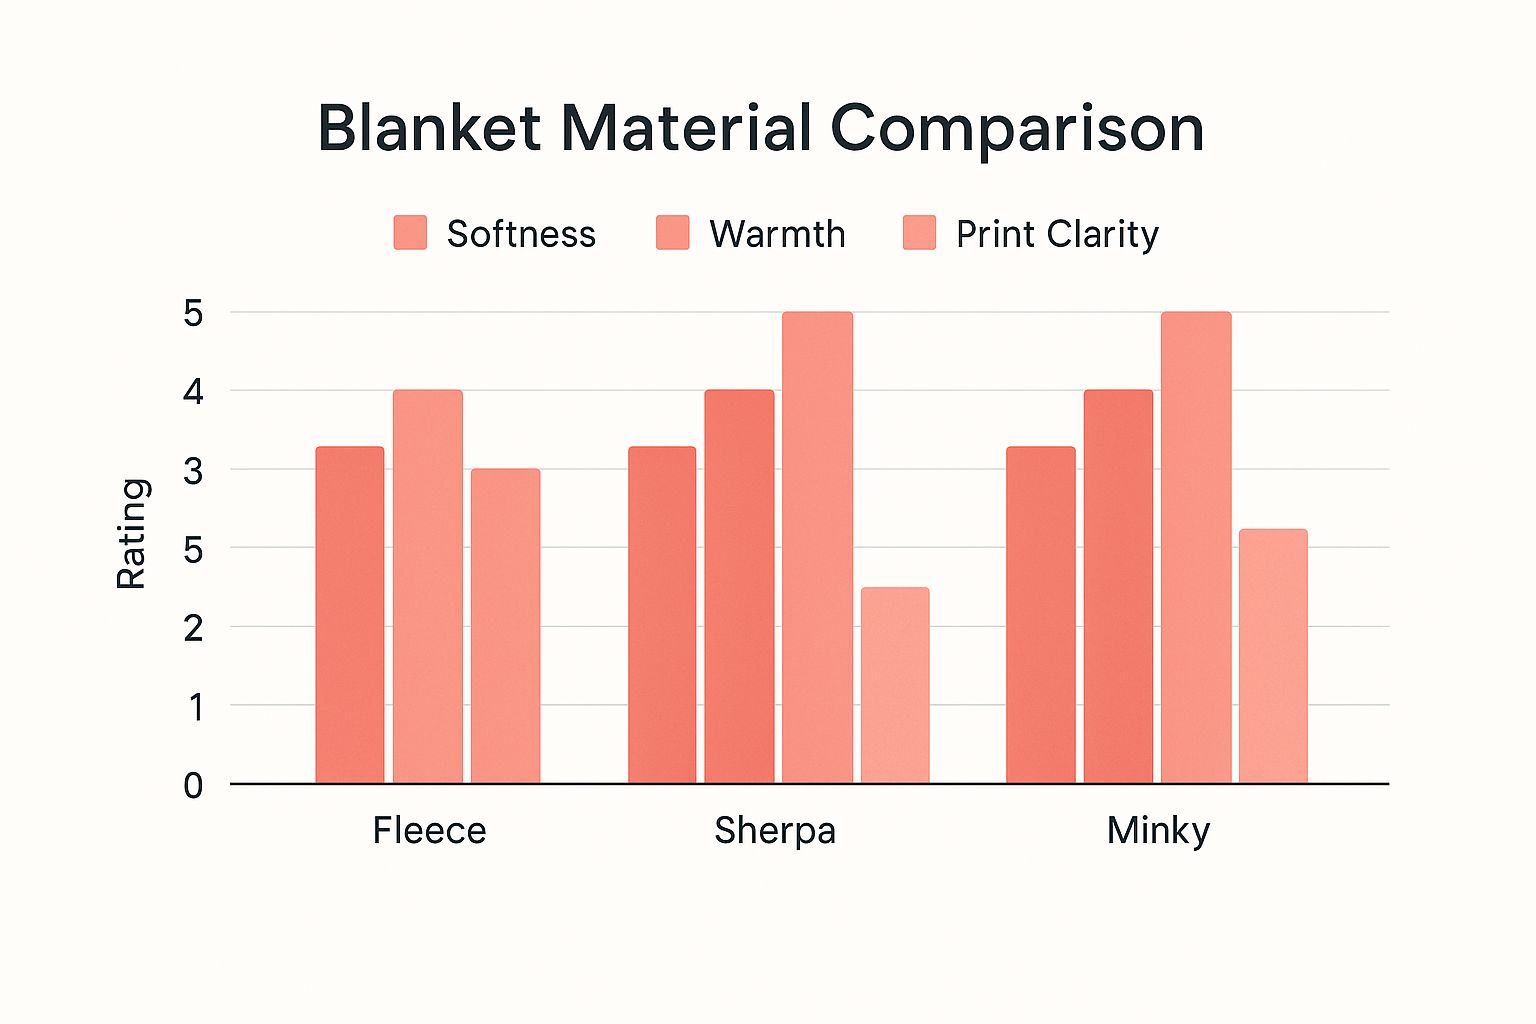
As you can see, fleece and minky are standouts for print clarity, while sherpa takes the lead in warmth. Each one is a great choice, depending on what you value most.
- Fleece: This is a versatile and incredibly popular choice, known for its lightweight feel and smooth surface. It acts as an excellent canvas for photos, allowing for sharp details and brilliant color. Since it’s relatively thin, it’s perfect as a decorative throw for the couch or as a gift for someone in a warmer climate.
- Sherpa: For the ultimate in warmth and coziness, sherpa is the hands-down winner. It features a soft, printable fleece front and a thick, woolly sherpa backing that feels like sheepskin. This dual-layer design makes it much warmer and plusher, perfect for snuggling up during cold winter months. Photo quality is still fantastic, but its main draw is that luxurious comfort.
- Minky: Famous for its incredible softness, minky is a top choice for baby blankets or anyone who loves a silky-smooth texture. The fabric is gentle on sensitive skin and holds color exceptionally well, ensuring your photos look stunning for years to come.
When choosing, think about who the blanket is for and what its main job will be. For a vibrant wall tapestry or a Mother's Day gift meant for display, fleece offers the best visual pop. For a comforting holiday gift in December, the superior warmth of sherpa is unmatched.
Deciding on the perfect material for your photo blanket project comes down to what you need most. Do you prioritize vibrant, crisp images, or is plush, cozy warmth the main goal? Balancing these qualities will help you choose the right fabric.
A side-by-side evaluation can make this decision even easier.
Comparing Blanket Materials Fleece Sherpa and Woven Cotton
| Feature | Fleece | Sherpa | Woven Cotton |
|---|---|---|---|
| Feel | Soft & smooth | Plush & fluffy | Textured & classic |
| Warmth | Medium | High | Medium |
| Photo Clarity | Excellent | Very Good | Good (Artistic) |
| Weight | Lightweight | Medium-weight | Heavyweight |
| Best For | Vibrant displays, gifts | Maximum coziness, winter | Heirloom gifts, decor |
Ultimately, the best material really depends on your specific needs. Balancing softness, warmth, and picture quality will ensure your final product is both beautiful and functional.
To help you make the perfect choice, you can learn more about the differences in our custom blanket materials guide on fleece vs. sherpa vs. woven. This deeper dive will provide even more clarity as you design a blanket with photos.
Selecting and Arranging Your Photos
This is where the real magic begins. The heart of your blanket’s story is in the photos you choose and how you bring them together. It’s the step where your vision truly comes alive, transforming a simple piece of fabric into a tapestry of cherished moments.
Picking the right images is a mix of heart and a little bit of technical know-how. Before you even start designing, you have to think about image quality. A beautiful, high-resolution photo on your screen can end up looking blurry or pixelated when it’s enlarged to fit a whole blanket. The best move is to always use the original files straight from your phone or camera—that’s the secret to a sharp, clear final product.

Getting this initial selection right ensures the technical foundation of your blanket is solid, so there are no disappointing surprises later. For a complete breakdown of what makes a photo print-ready, you can check out our guide on photo requirements for custom blankets.
Mastering the Art of the Layout
Once you’ve gathered your best high-quality images, it’s time to decide how they’ll all fit together. The layout you choose has a huge impact on the blanket’s overall feel. Are you going for a single, powerful image that makes a bold statement? Or a dynamic collage that tells a richer story?
Think about these two main approaches:
- The Single-Image Showcase: This layout is perfect when you have one truly stunning photograph. Think of a professional family portrait, a breathtaking landscape from a trip you’ll never forget, or a close-up of a beloved pet. A single image creates a focused, artistic piece that really grabs your attention.
- The Multi-Photo Collage: A collage is your go-to for capturing a whole range of memories. It’s perfect for a “year in review” blanket for the holidays or a collection of sweet snapshots for a Mother’s Day gift. This approach lets you weave multiple stories into one beautiful design.
When you're building a collage, try to stick to a theme. A themed blanket feels so much more impactful than just a random jumble of pictures. A wedding blanket, for instance, could feature photos from the ceremony and reception, while a graduation gift might show images from childhood all the way to the big day.
A great tip for collage design is to balance the "visual weight." Mix close-up shots with wider-angle photos, and alternate between portraits and action shots. This variety keeps the eye moving and makes the entire design more engaging.
Creating Visual Harmony
Achieving a balanced and harmonious design is key, especially with a collage. Pay close attention to the colors and lighting across your different photos. Images that have similar color palettes or lighting conditions will naturally look good together, creating a polished, professional feel.
To help you decide on the best arrangement for your story, let’s compare the strengths of each layout style.
| Layout Style | Best Use Case | Design Consideration |
|---|---|---|
| Single Image | High-impact professional portraits, stunning landscapes, or a single powerful memory. | The photo must be extremely high-resolution to avoid any blurriness when enlarged. |
| Grid Collage | Showcasing multiple moments equally, like photos from each month of a baby's first year. | Keep photos in a consistent orientation (all square, all landscape) for a clean, orderly look. |
| Freestyle Collage | Creating a dynamic, scrapbook-style feel with overlapping images of different sizes. | Balance larger, focal-point photos with smaller, supporting images to guide the viewer's eye. |
Ultimately, the best layout is the one that tells your story and highlights your favorite memories. Whether you choose one incredible photo or a collection of joyful moments, that thoughtful arrangement is what will make your blanket a treasured keepsake for years to come.
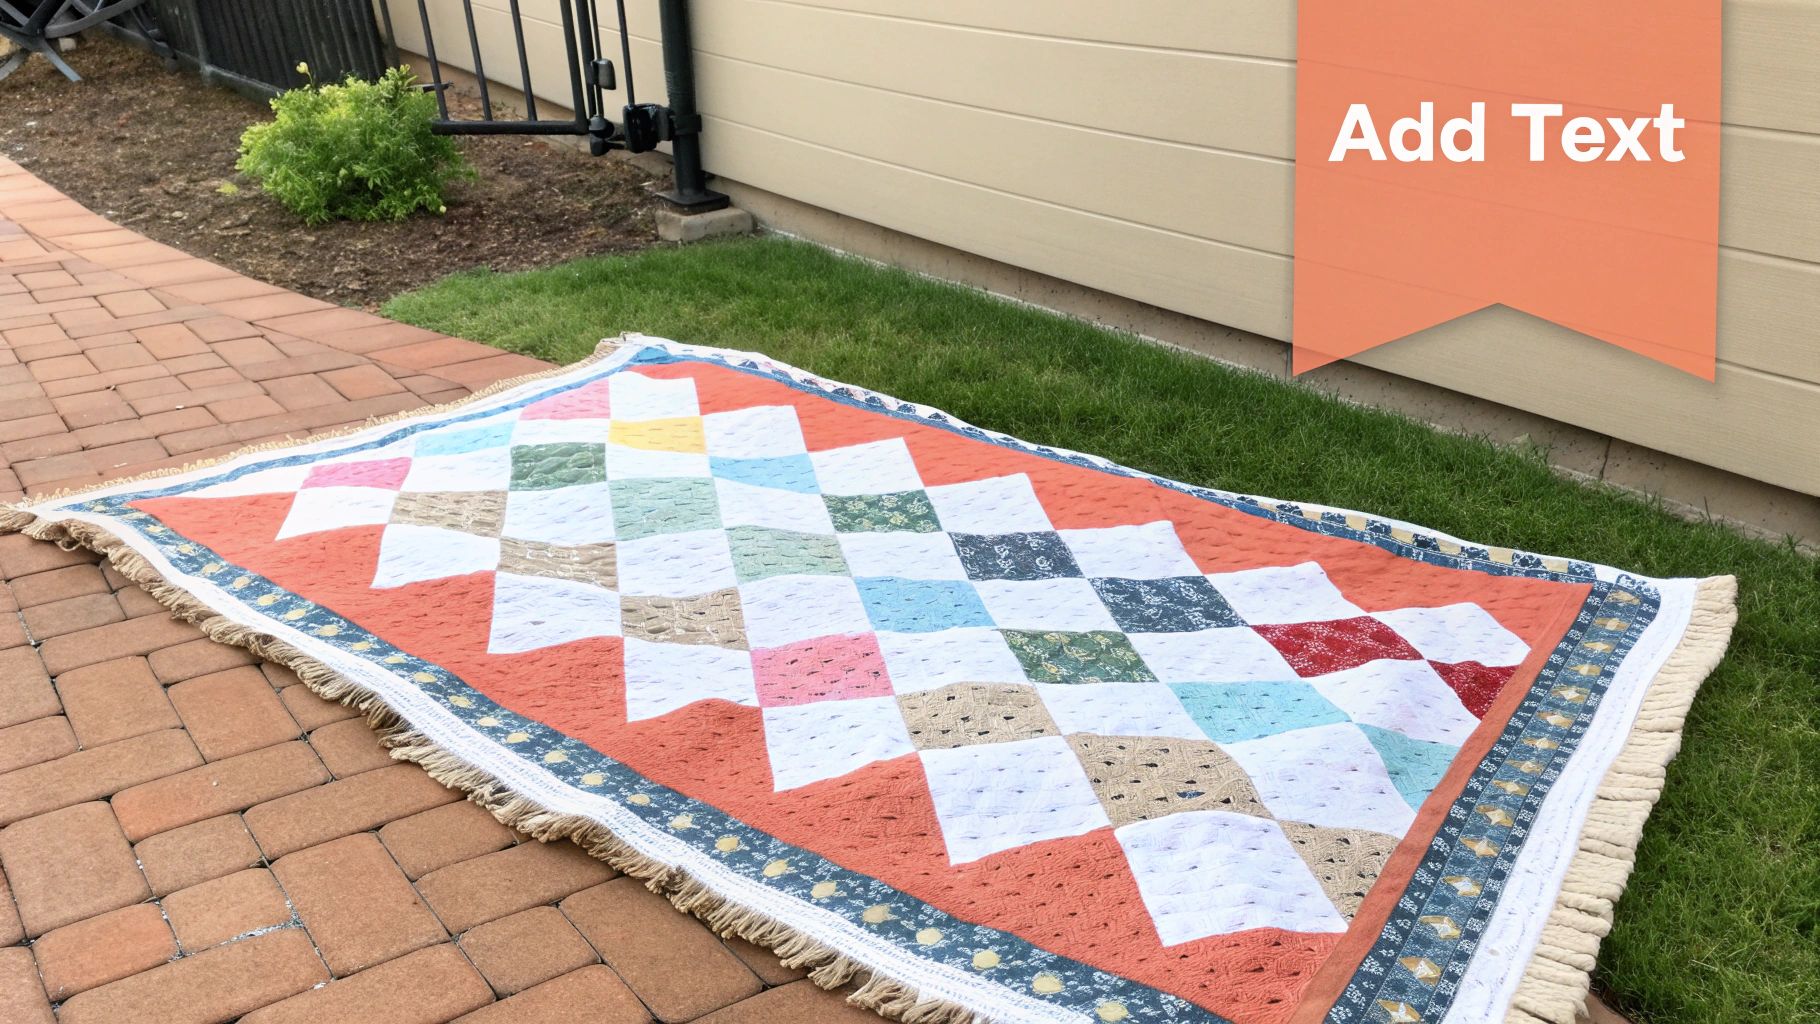
Personalizing Your Design with Text
Adding text is where your project goes from being a simple collection of pictures to a deeply personal story. When you design a blanket with photos, the right words, names, or dates can transform it into a true heirloom. This is your chance to add context and emotion, making the blanket unmistakably yours.
A thoughtful message can turn a beautiful gift into an unforgettable one. Think about the occasion—for a holiday gift, adding "The Miller Family Christmas 2024" creates a timeless keepsake. For Mother's Day, a simple "We love you, Mom" speaks volumes. The goal is to choose words that enhance the memories in the photos, not overpower them.
Choosing Fonts and Finding the Right Placement
The style of your text matters just as much as the words you choose. The font should complement the overall mood of your photos. A playful, rounded font might be perfect for a kid's birthday blanket, while an elegant script is a much better fit for a wedding or anniversary gift.
Above all else, focus on readability. Always pick a font that’s clear and easy to read, even from a distance. Steer clear of overly ornate or thin fonts that could get lost in the fabric's texture.
When you're placing your text, think about the "visual flow" of your photo layout. Try positioning names or dates in a corner or along a border to frame the images. A meaningful quote, on the other hand, could be centered in a less busy part of a photo, like an open sky or a patch of grass.
Strategic placement makes sure your words are a beautiful accent, not a distraction. Don't be afraid to test different positions in the design tool to see what looks the most balanced.
Using Themes and Borders for a Polished Finish
Many design platforms offer pre-made themes and decorative borders that give your Custom Photo Blankets a professional, cohesive look. These elements are designed to tie your photos and text together seamlessly, saving you a lot of guesswork.
- Thematic Elements: Look for themes that match your occasion, like floral motifs for Mother's Day, festive patterns for the holidays, or classic monograms for an anniversary.
- Borders and Frames: A simple border can define the edges of your design, making the whole layout feel more intentional and polished. This is especially helpful for collage-style blankets because it creates a clean, unifying frame around all the different images.
Using these built-in features saves you time and helps ensure all the design elements work in harmony. They provide the perfect finishing touch, pulling your photos and text together into a beautifully complete and meaningful creation.
Photo Blanket Ideas for Every Occasion
When you design a blanket with your own photos, you’re not just making a cozy throw. You’re weaving a personal story for a specific moment, turning a thoughtful gift into a memory that really connects with the person you’re giving it to.
This is exactly why the world of personalized gifts is booming. Custom products like photo blankets are a huge part of a market expected to grow from $21.54 billion in 2024 to $22.81 billion in 2025. People are looking for gifts that feel truly unique and meaningful, especially for holidays and anniversaries. You can get the full scoop on the rise of personalized products over on MediaClip.ca.
For Holidays in November and December
The winter holidays are the perfect time for a gift that radiates warmth and nostalgia. This is where a Custom Photo Blanket shines, especially when you design it as a "year in review" for the whole family.
- Layout Idea: Pull together the best moments from the past year into a lively collage. Think birthdays, summer vacations, silly candid smiles, and festive get-togethers.
- Material Choice: You can’t go wrong with a plush sherpa blanket. It offers that extra warmth and luxurious feel that’s just right for snuggling by the fire.
- Personalization Tip: Add the year somewhere in the design, like "The Adventures of 2024," to make it a timeless keepsake everyone will love looking back on.
Holiday blankets are all about capturing the spirit of togetherness. If you pick photos filled with shared joy and laughter, the gift feels incredibly special and serves as a cozy reminder of family connection all season long.
For Mother's Day in April and May
Mother's Day is all about celebrating family and that one-of-a-kind bond you share. A photo blanket is a beautiful way to wrap her in memories she holds dear.
- Layout Idea: A clean, elegant layout with a beautiful family portrait as the centerpiece always works wonders. You can frame it with smaller, candid shots of the kids or grandkids.
- Material Choice: Soft fleece is a fantastic option here. It reproduces photos with incredible vibrancy and clarity, making it a beautiful decorative piece for the living room or her favorite armchair.
- Personalization Tip: A simple, heartfelt message like "Home is wherever Mom is" or just "We love you" adds a layer of warmth that goes beyond the fabric.
For Other Major Milestones
Life is full of big moments worth celebrating, and a personalized blanket is the perfect way to commemorate them. Each milestone calls for its own unique design.
| Occasion | Design Recommendation | Personalization Idea |
|---|---|---|
| Anniversaries | Go for a "then and now" theme. Place a wedding photo next to a more recent picture to show how your love has grown. | Add your wedding date and a short line from your vows or first dance song. |
| Graduations | Tell a story with a collage that follows their journey, from baby pictures all the way to graduation day. | Make sure to include the graduate's name, school, and class year for that commemorative touch. |
| Memorials | A single, high-quality portrait or a tasteful collection of their favorite photos can serve as a comforting and beautiful tribute. | Add their name, dates of life, and a quote that perfectly captures their spirit. |
By tailoring your design to the event, you take the gift from a simple object to a meaningful expression of love that will last for years.
How to Finalize and Order Your Blanket
You’ve poured your creativity into the design, and now you’re just one step away from bringing it to life. Before you hit that order button, it’s worth taking a moment for a final review. This last check is your best bet to make sure your Custom Photo Blanket shows up exactly as you imagined, without any little mistakes that could spoil the big reveal.
Take a second to really use the preview function. This is your crystal ball—it shows you precisely how the finished blanket will look, from photo placement and text alignment to how the images wrap around the edges. It’s the easiest way to avoid any unwelcome layout surprises.

Your Final Pre-Order Checklist
Before you confirm the order, run through this quick but essential checklist. Trust me, these few steps can save you from the most common (and preventable) errors, ensuring your blanket is perfect for that special holiday or Mother's Day gift.
- Look for Resolution Warnings: Most design tools will flag low-quality images that might print poorly. Do a quick scan to make sure there are no warnings—this is key for getting sharp, clear photos without any pixelation.
- Proofread All Text: Read every single word, name, and date out loud. It’s surprisingly easy to miss a typo when you’re familiar with the text, so a fresh pair of eyes (or just reading it aloud) does wonders.
- Confirm Material and Size: Just to be safe, double-check that you’ve selected the right fabric—whether it’s that cozy sherpa or a vibrant fleece—and the perfect dimensions for how you plan to use it.
One last thing: pay close attention to the estimated delivery window, especially if you’re ordering for a specific date. Production and shipping times can vary, so planning ahead is the best way to make sure your heartfelt gift arrives on time for the celebration.
Creating these personalized keepsakes is part of a huge trend. The global blanket market is on track to hit $17.29 billion by 2033, and photo blankets are a fast-growing piece of that pie. It all points to a bigger shift toward personalized items that fill both a practical and emotional need. You can see more data on the expanding blanket market at Straits Research.
Once you're completely happy with your design, head to the checkout. Our ordering process is designed to be simple and straightforward. If you want a full rundown, you can learn more about how our ordering works on our site.
Got Questions? We’ve Got Answers.
When you’re about to turn your favorite photos into a cozy blanket, a few questions always pop up. It’s smart to get the details sorted out first. That way, the design process is a breeze, and you’ll end up with something you absolutely love for years to come. Let’s tackle some of the most common ones.
What Photo Resolution Do I Need for a Blanket?
For a sharp, clear blanket, your photos should be at least 150 DPI (dots per inch). But if you’re aiming for that flawless, gallery-quality look, 300 DPI is the gold standard.
The good news? Most modern smartphones take pictures that are more than high-quality enough. Just be sure to pay attention to any low-resolution warnings in the design tool you’re using. A bigger blanket needs a better-quality image to avoid looking blurry or pixelated when it’s printed.
Here's a pro tip: Avoid using photos you’ve saved from social media. Platforms like Facebook and Instagram compress images like crazy to save space, which tanks their quality. They might look fine on your screen, but they often turn into a pixelated mess in print. Always, always use the original, full-resolution file straight from your phone or camera for the best result.
How Do I Wash My Custom Photo Blanket?
Keeping your new blanket looking and feeling great is actually pretty simple. Most fleece and sherpa blankets are designed to be machine washable, so you don’t have to stress.
- Wash it in cold water on a gentle cycle.
- Tumble dry on the lowest heat setting available.
- Steer clear of bleach or fabric softeners. These can make the printed images fade over time and can even damage the soft, cozy fibers of the fabric.
Follow these simple care steps, and your blanket will keep its vibrant colors and snuggly feel for a long, long time.
Ready to turn your warm memories into something you can hold? At That Blanket Co, we make it incredibly easy to design a beautiful, high-quality custom photo blanket that you’ll cherish forever. Start designing your blanket today!