


How to Make Your Own Blanket: A Step-by-Step Guide 2025
Imagine curling up under a soft, handmade blanket that you crafted with your own hands. There is something truly special about the comfort and pride that comes from a project like this. Whether you are brand new to crafting or already enjoy creative projects, this guide will show you how to make your own blanket in 2025.
We will walk you through every step, from picking out the perfect materials to adding personal touches that make your creation unique. By the end, you will have all the tools and inspiration you need to create a cozy masterpiece that reflects your style and brings warmth to your home.
Choosing the Right Materials and Tools
Ready to make your own blanket? Selecting the best materials and tools is the first step on your creative journey. Whether you're after a snuggly throw or a unique gift, the right choices here will make the process smoother and the final result even cozier.
Understanding Blanket Fabrics
When you make your own blanket, the fabric you choose sets the tone for comfort and style. Popular options include fleece, cotton, flannel, wool, and minky. Fleece is soft, affordable, and easy to care for, while cotton is breathable and hypoallergenic. Flannel provides extra warmth, and wool is wonderfully insulating but may require special care. Minky is ultra-soft, perfect for baby or luxury blankets.
Eco-friendly, hypoallergenic, and sustainable fabrics are trending for 2025, offering both comfort and peace of mind. Consider fabric width and weight, as these affect your blanket’s coziness and practicality. Want a deeper dive into fabric choices? Check out this Guide to custom blanket materials for more details.
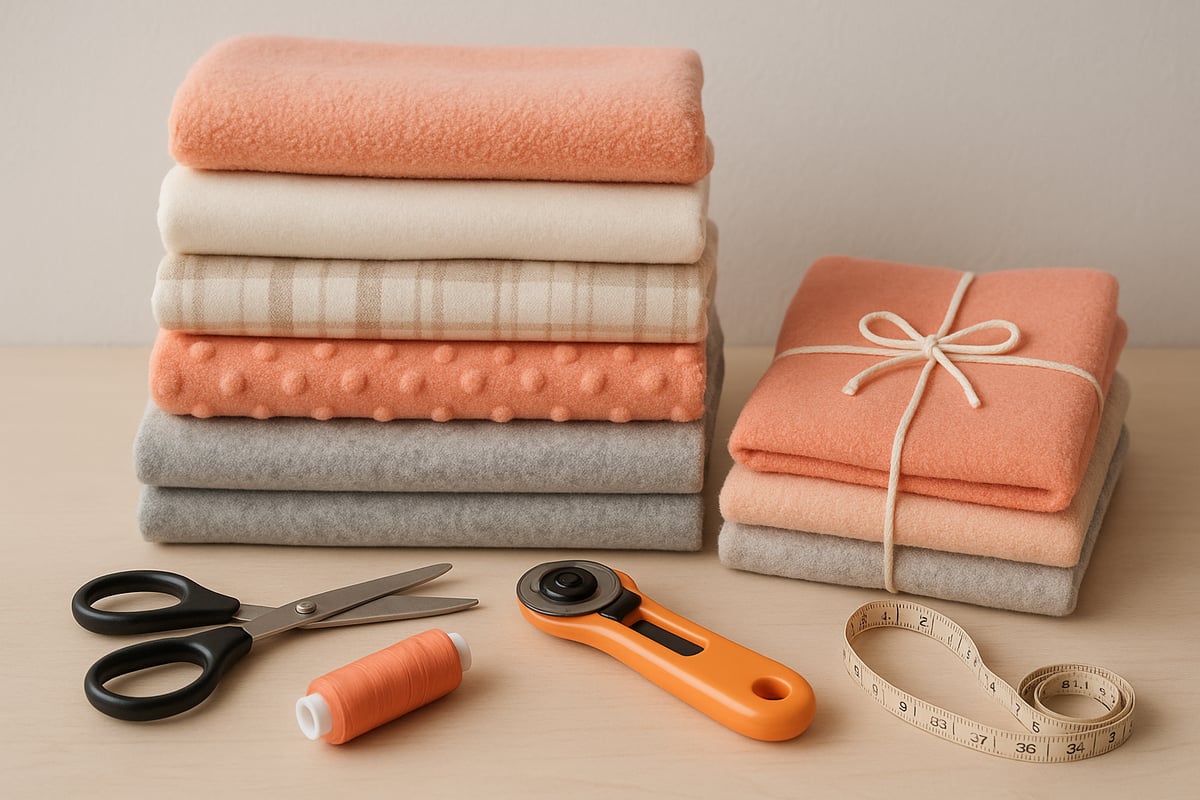
Essential Tools and Supplies
To make your own blanket, gather these essential tools: fabric scissors, a rotary cutter, cutting mat, measuring tape, pins, needles, and optionally, a sewing machine. Choose high-quality thread for strong, lasting seams. Batting adds warmth, and fabric glue is handy for no-sew projects.
Here’s a quick checklist for your toolkit:
- Fabric scissors for precise cuts
- Rotary cutter and mat for smooth, straight edges
- Measuring tape for accuracy
- Pins or clips to hold layers together
- Needles or sewing machine depending on your method
Remember to handle sharp tools carefully. A rotary cutter can speed up cutting and help you achieve crisp, professional edges.
Calculating Fabric Yardage
Before you make your own blanket, it’s important to calculate how much fabric you’ll need. Blanket sizes vary from baby (30x40 inches) to king (108x90 inches). Use this simple formula: desired length plus seam allowance, multiplied by the width, then divide by the fabric width.
Here’s a quick reference table:
| Blanket Size | Typical Dimensions | Fabric Needed |
|---|---|---|
| Baby | 30x40 in | 1 yard |
| Throw | 50x60 in | 2 yards |
| Twin | 65x90 in | 2.5 yards |
| Queen | 90x90 in | 3 yards |
| King | 108x90 in | 3.5 yards |
Always buy a little extra to account for shrinkage or errors. A standard throw usually needs about 2 yards of fabric.
Selecting Patterns, Colors, and Textures
Picking a pattern is one of the most exciting parts when you make your own blanket. Choose designs that match your personal style or home décor. Want a bold statement? Mix and match vibrant colors. For a calmer look, try soft pastels or subtle prints.
Texture matters too. Smooth fabrics like cotton are classic, while plush minky or textured fleece add coziness. For 2025, geometric patterns and pastel shades are especially popular. Try combining different textures for a modern, layered effect.
Budgeting for Your Blanket Project
Budgeting helps you make your own blanket without surprises. Factor in fabric, tools, thread, and optional extras like batting or trims. Costs can range from $20 to $60, depending on your choices.
Want to save? Repurpose old fabric, look for sales, or use coupons. Here’s a quick breakdown:
- Fabric: $10–$40
- Tools: $5–$20 (many are reusable)
- Embellishments: $5–$10
DIY doesn’t have to be expensive. With a little planning, you can create a beautiful, unique blanket that fits your budget and style.
Planning Your Blanket Design
Designing your blanket is where creativity shines and your personality comes to life. This stage helps you make your own blanket truly special by considering its type, size, pattern, and custom details. Let’s walk through the essential steps to create a plan that fits your needs and style.
Deciding on Blanket Type and Purpose
The first step to make your own blanket is choosing its type and intended use. Do you want a warm quilt for winter snuggles, a decorative throw for your sofa, or a lightweight baby blanket?
Popular blanket types include:
- Weighted blankets for relaxation
- Patchwork or memory blankets for sentimental value
- No-sew fleece throws for quick projects
- Knitted or crocheted pieces for a textured look
Think about who the blanket is for and what purpose it will serve. For example, weighted blankets are perfect for stress relief, while patchwork designs are meaningful gifts. Matching the blanket type to its use ensures your project is both functional and heartfelt.
Measuring and Sizing Your Blanket
To make your own blanket fit perfectly, accurate measurements are key. Standard blanket sizes range from baby (30x40 inches) to king (108x90 inches). Consider whether you want a standard size or something custom.
Here’s a quick reference table for common blanket sizes:
| Type | Dimensions (inches) |
|---|---|
| Baby | 30 x 40 |
| Throw | 50 x 60 |
| Twin | 66 x 90 |
| Queen | 90 x 90 |
| King | 108 x 90 |
Measure your space or recipient to decide on the right size. Add extra inches for seam allowance and any special borders. Careful planning at this stage helps make your own blanket look and feel just right.
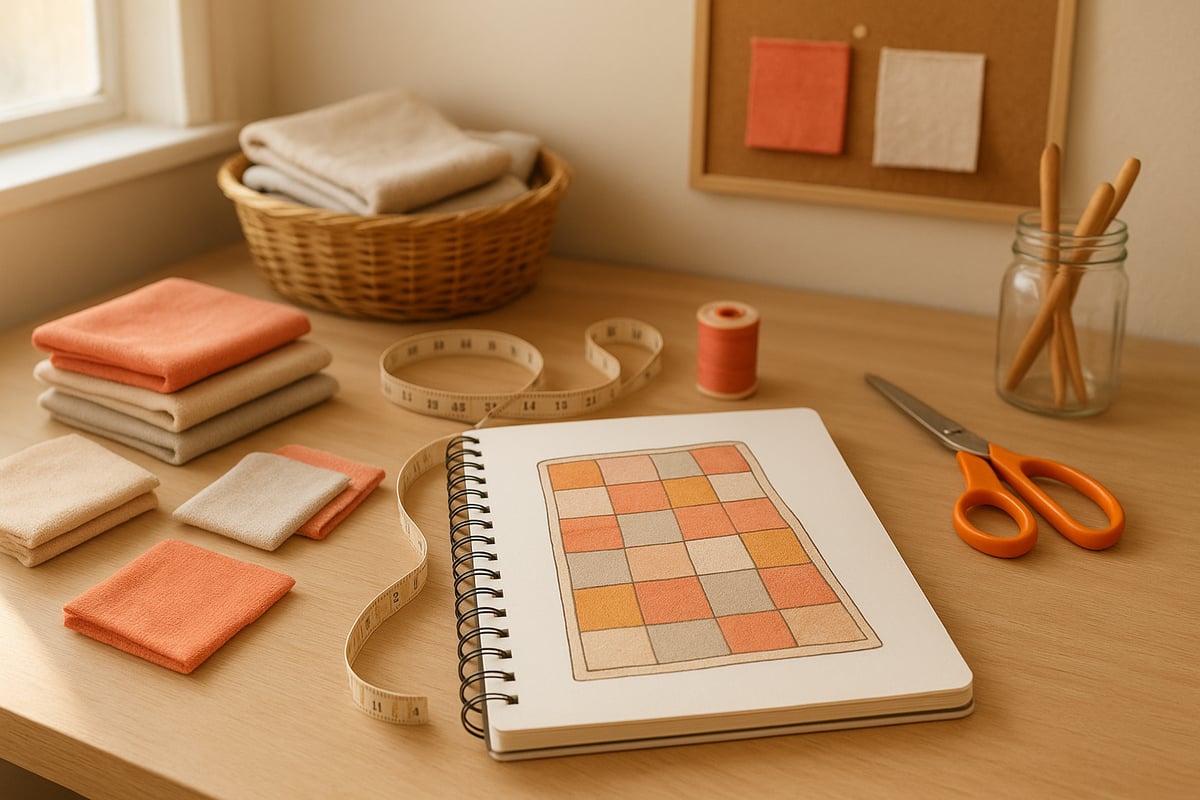
Creating or Sourcing a Pattern
Whether you want to make your own blanket with a simple or intricate design, choosing a pattern is an exciting step. You can use ready-made patterns or create your own based on inspiration. Many free and paid patterns are available online, from basic squares to more complex patchwork.
For 2025, consider exploring bold prints, geometric shapes, and sustainable materials. To spark your creativity, check out Top Textile Design Trends for 2025: What's Next in Fabric & Pattern Design for fresh ideas and inspiration. Even beginners can start with classic rectangles or squares, gradually building confidence with more advanced styles.
Personalization and Custom Details
Adding a personal touch is what makes your own blanket one-of-a-kind. Think about including names, special dates, or messages using embroidery, applique, or fabric paint. You might use meaningful fabrics, like pieces from baby clothes or favorite t-shirts, to create a memory blanket that tells a story.
This is a wonderful opportunity to celebrate milestones, honor loved ones, or simply express your style. The possibilities are endless, and these details truly make your own blanket a cherished keepsake for years to come.
Step-by-Step Blanket Making Process
Embarking on the journey to make your own blanket is both exciting and rewarding. This step-by-step process is designed to help you confidently create a cozy, personalized blanket, regardless of your skill level. Let’s break down each stage, so you can enjoy every moment of your creative adventure.
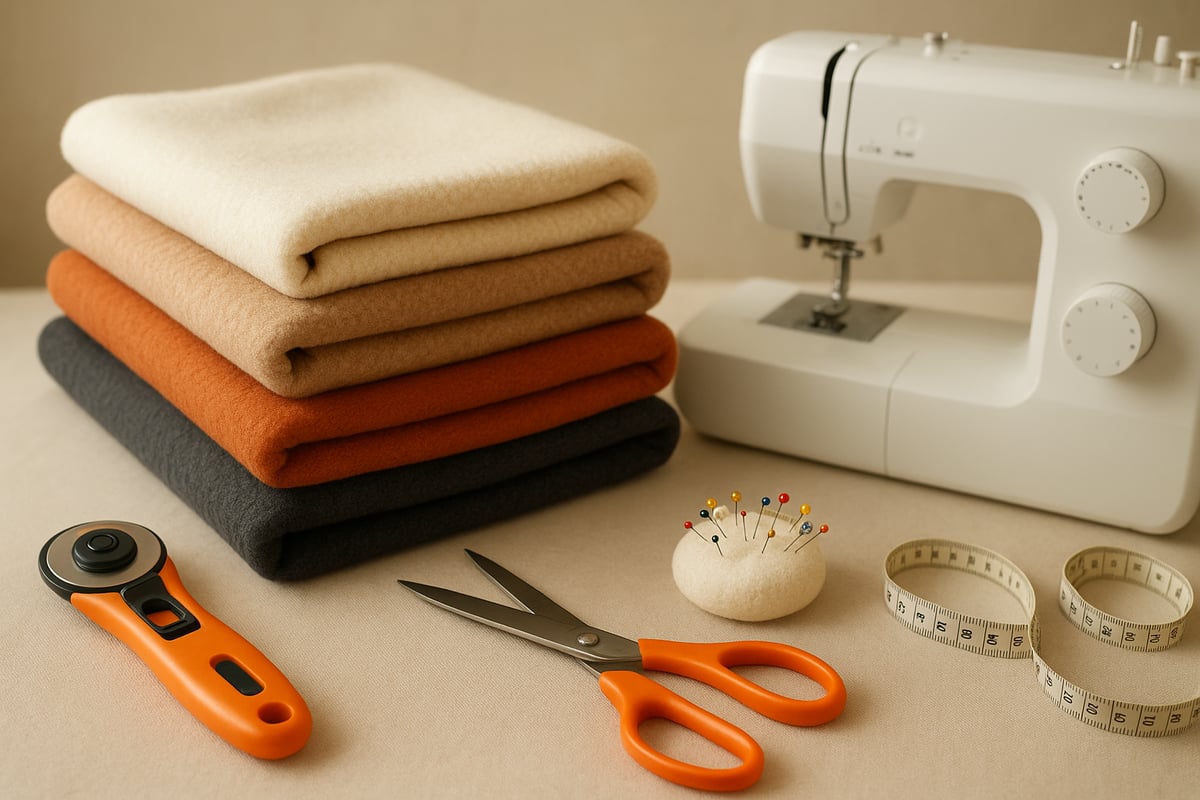
Preparing Your Workspace and Materials
Before you make your own blanket, set up a clean, organized workspace. Clear off a large table or use a flat surface where your fabric can lay out without bunching. Good lighting is essential, so you can see your measurements and cuts clearly.
Wash and iron your fabric before you begin. This step helps prevent shrinkage or color bleeding after you finish your blanket. Gather all your materials—fabric, scissors, rotary cutter, cutting mat, pins, needles, thread, and any extras like batting or fabric glue for no-sew methods.
Keep sharp tools safely stored when not in use, and always cut away from your body. Having everything within reach makes the process of making your own blanket smoother and more enjoyable.
Cutting Fabric to Size
Accurate cutting is the foundation when you make your own blanket. Start by measuring and marking your fabric according to your chosen blanket size. Use a measuring tape and fabric chalk or a washable marker to outline your dimensions.
Place your fabric on a cutting mat for stability. A rotary cutter is ideal for straight, clean edges, but fabric scissors work well too. If your blanket has multiple layers or pieces, stack them and cut them together to save time and ensure consistency.
Double-check your measurements before making each cut. Taking your time here will make assembling your blanket much easier and helps ensure the finished product is exactly the size you want when you make your own blanket.
Piecing and Arranging Fabric (for Multi-Piece Designs)
For patchwork, quilted, or multi-piece blankets, arrange your fabric pieces according to your pattern. Lay them out on your workspace to visualize the design and make adjustments before sewing. This step is crucial to achieving a balanced and visually appealing blanket.
Pin or baste the pieces together to hold them in place. Use straight pins for precise alignment or a temporary fabric adhesive if you prefer. For patchwork, align each square’s edges carefully to avoid uneven seams later.
If you make your own blanket with intricate designs, snapping a quick photo of your layout can help you remember the arrangement as you sew. This organization ensures your blanket turns out just as planned.
Sewing or Securing the Edges
When you make your own blanket, securing the edges is key to durability and a polished look. Decide if you’ll use a sewing machine, hand sewing, or a no-sew technique like tying or gluing.
For sewn blankets, use a straight stitch along the edges, leaving a small seam allowance. If you prefer hand sewing, a basic running stitch works well. For no-sew blankets, tie knots along the edges or use fabric glue to bond layers.
Finish raw edges with binding or a simple hem. Take your time to ensure neat, even seams. This attention to detail not only enhances the look but also extends the life of your blanket.
Adding Batting or Lining (Optional)
Adding batting can make your own blanket warmer and more substantial. Batting is a soft layer placed between the front and back fabric pieces, often used in quilts or winter throws.
Cut the batting slightly smaller than your fabric to avoid bulk at the edges. Layer the batting between the top and backing fabric, smoothing out any wrinkles. Pin or baste the layers together to keep batting from shifting.
Secure the batting with quilting stitches, tacking, or simple hand ties. This extra step makes your blanket cozier and adds a professional touch, especially for those chilly nights.
Creating Decorative Elements
Personalizing your blanket is one of the joys of making your own blanket. Consider adding decorative touches like borders, ruffles, or trims. Use decorative stitches or embroidery to create unique patterns or add a splash of color.
For a polished edge, try the classic blanket stitch—it’s both functional and attractive. If you want to incorporate photos or meaningful images, explore printable transfer sheets or fabric paint for custom designs.
For even more inspiration on adding creative elements, visit this Complete guide to photo blankets and discover tips to make your own blanket truly one-of-a-kind.
Assembling the Blanket Layers
Careful assembly is crucial when you make your own blanket. Start by aligning the top, batting, and backing layers on your workspace. Smooth out each layer to prevent wrinkles and puckering.
Pin or baste the layers together, starting from the center and moving outward. This method helps distribute fabric evenly and avoids shifting during sewing. If you’re quilting, mark your stitching lines before you begin.
Sew around the edges, leaving a small opening to turn the blanket right side out if needed. Once turned, stitch the opening closed and add any final quilting or tacking to secure the layers.
Finishing Touches and Final Inspection
After you make your own blanket, give it a thorough inspection. Trim any loose threads and excess fabric. Check all seams for missed stitches or weak spots, reinforcing as needed.
Press your finished blanket with a warm iron to smooth out wrinkles and set the stitches. Follow the fabric care instructions for the first wash and dry to ensure longevity.
A well-finished blanket not only looks professional but also feels wonderful to use. These final steps guarantee your handmade creation is ready for years of comfort and enjoyment.
Troubleshooting Common Issues
Even experienced crafters encounter challenges when they make their own blanket. Here’s a quick-reference table for common problems and solutions:
| Issue | Cause | Solution |
|---|---|---|
| Uneven edges | Inaccurate cutting | Re-measure and trim |
| Puckering | Tension too tight | Adjust machine tension |
| Missed stitches | Dull needle, tension | Replace needle, check tension |
| Stretching/shrinking | Fabric not prewashed | Always prewash fabrics |
| Loose seams | Weak thread or stitch | Reinforce with double stitching |
Don’t be discouraged by mistakes. Most issues can be fixed without starting over. Take your time, use quality materials, and enjoy the learning process as you make your own blanket.
Customization and Personal Touches
Blanket-making is all about putting your heart into every stitch. When you make your own blanket, you open the door to creativity, memories, and personal expression. Let’s explore fun and meaningful ways to make your blanket truly one of a kind.
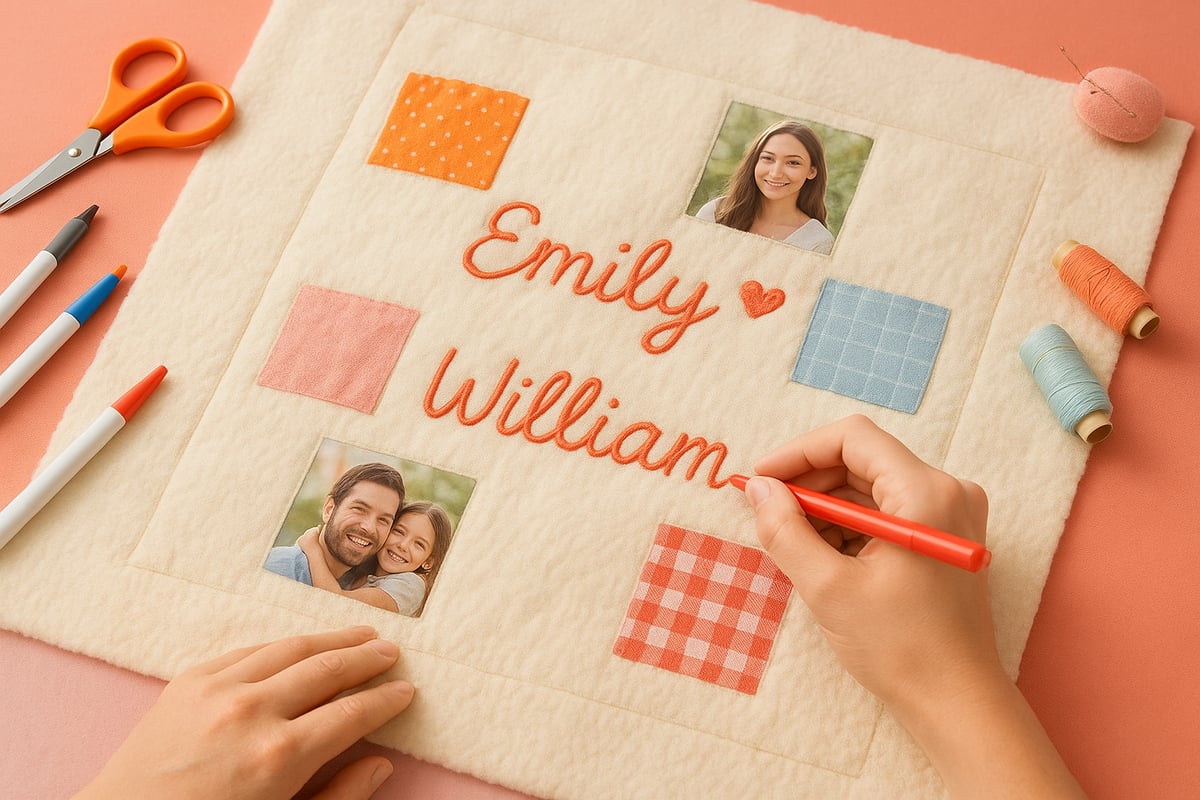
Adding Personalization Features
Personal touches transform a simple project into a cherished keepsake. When you make your own blanket, try these creative ideas:
- Embroidery: Stitch names, dates, or meaningful words directly onto the fabric.
- Applique: Add fun shapes or initials with cut-out fabric pieces.
- Fabric markers: Draw favorite quotes, doodles, or colorful designs.
- Iron-on patches: Attach themed patches for a playful touch.
For example, embroidering a child’s name on a baby blanket is a thoughtful way to celebrate a special arrival. Personalizing every detail lets you make your own blanket as unique as the person receiving it.
Incorporating Photos or Memory Fabrics
Want to capture memories in your project? Incorporate favorite photos or sentimental fabrics when you make your own blanket. It’s easier than you think:
- Use printable transfer sheets to add photos directly onto fabric.
- Cut up old T-shirts, baby clothes, or uniforms for a memory blanket.
- Arrange pieces in a collage or patchwork style.
If you’re looking for inspiration or step-by-step guidance, check out this collage blanket tutorial and tips to help you make your own blanket filled with memories. T-shirt quilts are a wonderful way to preserve moments that matter most.
Seasonal and Themed Blanket Ideas
Themed blankets make every occasion extra special. When you make your own blanket, think about:
- Holidays: Use festive fabrics for Christmas, Halloween, or other celebrations.
- Sports teams: Show team spirit with matching colors and logos.
- Special events: Commemorate weddings, graduations, or baby showers.
- Trends: Try custom star map designs or animal prints, which are popular for 2025.
Matching the theme to the recipient’s interests adds a thoughtful touch. It’s a fun way to make your own blanket stand out as a heartfelt gift.
Care Instructions for Personalized Blankets
After you make your own blanket, you want it to last. Follow these care tips for personalized projects:
- Wash in cold water with a gentle cycle.
- Avoid harsh detergents and bleach to preserve colors and designs.
- Tumble dry on low or air dry for best results.
- Press gently with a warm iron if needed.
Did you know personalized blankets can maintain their print quality for over 50 washes with proper care? When you make your own blanket, taking these steps ensures it stays beautiful and cozy for years to come.
Tips for a Professional Finish and Longevity
Creating a beautiful, long-lasting blanket is easier than you might think. When you make your own blanket, a few extra steps can take your project from homemade to heirloom quality. Let’s explore some friendly tips that help you achieve a polished look and ensure your cozy creation stands the test of time.
Techniques for Neat Edges and Corners
A crisp, even edge is one of the secrets to making your blanket look professionally crafted. When you make your own blanket, focus on trimming the edges carefully before adding binding or hemming. Mitered corners are a simple trick for achieving sharp, square corners that lay flat and look polished.
Try these steps for neat results:
- Fold the binding at a 45-degree angle at each corner.
- Press the binding with a warm iron for a crisp finish.
- Use clips or pins to hold everything in place as you sew.
A little extra attention to these details goes a long way. Your finished blanket will look and feel like it was made by an expert, not just at home.
Ensuring Blanket Durability
Durability matters when you make your own blanket, especially if you want it to last for years of snuggling or gifting. Always reinforce your seams, especially in high-stress spots like corners and edges. Double stitching is a great way to add extra strength without much extra effort.
Choose a strong, high-quality thread that matches your fabric’s needs. For thicker or heavier materials, use a heavier-weight thread for best results. If you’re adding embellishments, make sure they’re securely attached so they won’t come loose in the wash.
A sturdy blanket brings peace of mind, knowing your hard work will be enjoyed again and again.
Caring for Your Handmade Blanket
Proper care is essential to protect your creation and keep it looking fresh. When you make your own blanket, always check the care instructions for your fabric and thread. Most handmade blankets benefit from gentle washing in cold water and air drying or tumble drying on low.
Here’s a quick care table for reference:
| Fabric Type | Wash Temp | Drying Method |
|---|---|---|
| Cotton | Cold | Low/Line Dry |
| Fleece | Cold | Air Dry |
| Wool | Hand Wash | Flat Dry |
Store your blanket in a cool, dry place to avoid pilling and fading. With a little care, your handmade blanket can look beautiful for years.
Eco-Friendly and Sustainable Practices
Sustainability is trending, and you can make your own blanket while being kind to the planet. Opt for organic or recycled fabrics, or repurpose old textiles for a unique, eco-friendly twist. Upcycled denim, for example, creates a blanket that’s both durable and stylish.
For more inspiration on choosing sustainable materials and learning about the latest innovations, check out 2025 Fabric Trends: Sustainable Innovations, Bold Prints & Tech Textiles. You’ll discover new options that make your blanket both beautiful and environmentally conscious.
Together, we can create blankets that bring comfort to our homes and help protect the earth.
Blanket-Making for Gifting and Special Occasions
Creating a gift with your own hands is a deeply meaningful experience. When you make your own blanket, you are not only crafting something cozy and practical, but also giving a piece of yourself to someone special. Whether the gift is for a baby shower, a graduation, or a holiday, a handmade blanket stands out as a truly personal gesture.
Choosing the Right Blanket for the Occasion
Selecting the perfect materials and design helps ensure your blanket feels just right for the event. If you want to make your own blanket for a baby, soft pastel colors and plush fabrics like minky are always a hit. For housewarmings, bold patterns or geometric designs can add a splash of personality to any living space.
Personalization makes each gift unforgettable. Adding embroidered names or meaningful dates can turn a simple blanket into a lifelong keepsake. Looking for inspiration? Check out these Creative custom blanket ideas for thoughtful ways to tailor your project to any occasion.
Packaging and Presenting Your Handmade Blanket
Presentation matters just as much as the blanket itself. When you make your own blanket, consider unique ways to wrap your creation. Place it in a reusable fabric bag, tuck it into a decorative box, or tie it with a bright ribbon for a cheerful touch.
Add a handwritten note or a small card with care instructions. This thoughtful gesture lets the recipient know how much care went into their new blanket. A beautiful presentation turns your handmade blanket into a memorable unboxing experience.
Sharing Your Creation: Social Media and Craft Communities
Finishing a blanket is a proud moment, and sharing it can inspire others. When you make your own blanket, take a few bright, clear photos in natural light. Use props or backgrounds that highlight the colors and textures you chose.
Post your creation on social media with popular hashtags like #handmadeblanket to connect with a supportive community. There are over 100,000 posts in 2024, so you will find plenty of inspiration and encouragement. Joining online crafting groups can also help you learn new techniques and celebrate your progress.
The Joy and Impact of Handmade Gifts
Handmade gifts have a unique way of touching hearts. When you make your own blanket and give it to someone, you are sharing comfort, warmth, and love in every stitch. Many people cherish these gifts for years, often passing them down through generations.
Stories abound of memory blankets bringing comfort during difficult times, or becoming treasured keepsakes that remind families of special moments. A blanket made by you is more than just a gift, it is a symbol of care and connection that will be remembered long after the occasion has passed.
Now that we’ve explored how to choose the perfect materials, plan your design, and add those special personal touches, you’re all set to bring your own unique blanket to life. Whether you’re making a cozy throw for yourself or a heartfelt gift for someone special, remember that every stitch is a reflection of your creativity and care. If you’re feeling inspired to turn treasured memories into an extra-personal keepsake, we’re here to help you make it happen. Ready to transform your favorite moments into something warm and lasting? Start Personalizing your custom photo blanket today!