


How to Print on a Pillow for Stunning Results
So, you’re ready to turn a favorite memory into a huggable piece of home decor? The secret to an amazing photo pillow is starting with a great digital photo, picking a smooth fabric like polyester that makes colors pop, and using an online design tool to get the placement just right. This guide will walk you through exactly how to bring that idea to life.
Your Guide to Creating the Perfect Photo Pillow
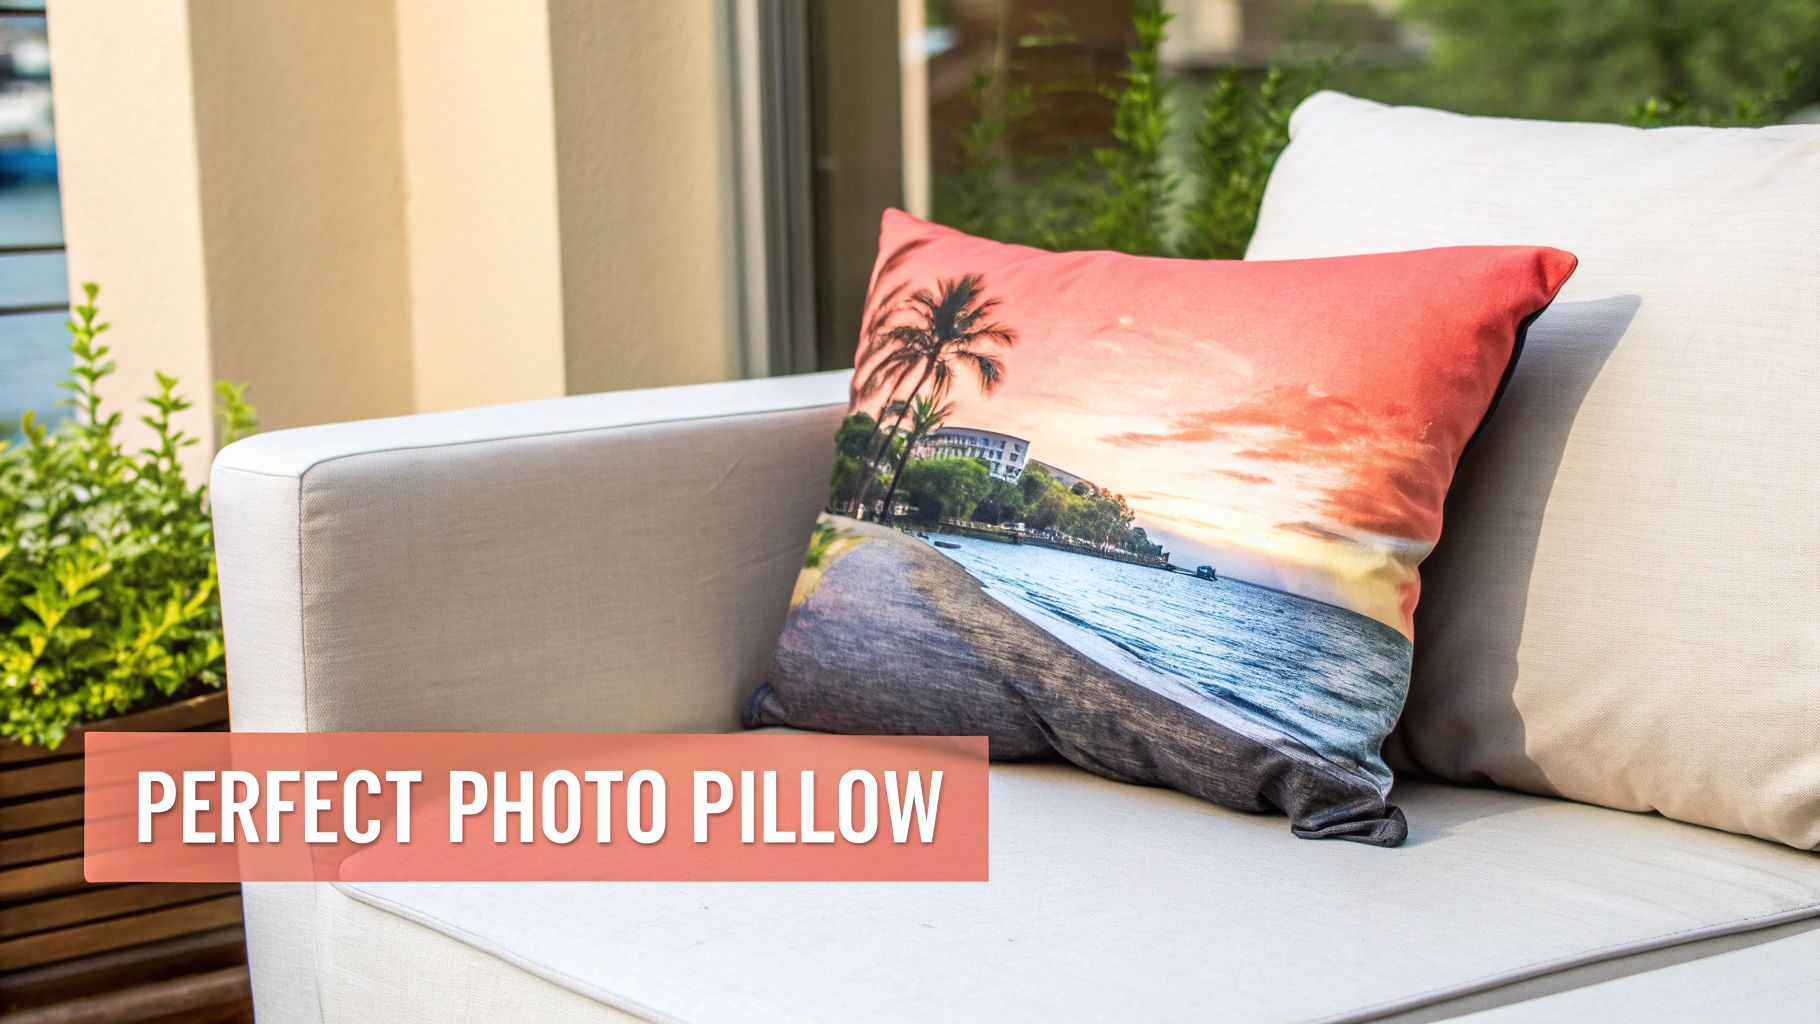
Turning a digital photo into something you can actually hold and squeeze is a pretty special way to keep memories close. A custom printed pillow is more than just another accent for your couch; it’s a functional piece of art that injects warmth and personality into any room. Think about that candid shot from a family vacation, a goofy portrait of your beloved pet, or even a child's first drawing—the right image can create something truly one-of-a-kind.
The process is more straightforward than you might imagine, but a few insider tips can take your final product from good to absolutely perfect. I've designed this guide to walk you through every step, making sure your vision comes out exactly as you pictured it.
More Than Just Decor
Personalized pillows are incredibly versatile, which makes them such a thoughtful item for just about any occasion. They're more than just a place to rest your head; they become conversation starters and daily reminders of the people and moments that truly matter.
Just think about the possibilities:
- Commemorative Gifts: A perfect way to mark a wedding, anniversary, or graduation with a photo that captures the heart of the day.
- Mother’s Day Treasures: Honor moms in April and May with a photo pillow paired with Custom Photo Blankets, showcasing family snapshots or kids’ artwork.
- Heartfelt Memorials: Keep the memory of a loved one or a cherished pet alive in a gentle, comforting form.
- Holiday Surprises: As we head into the holiday season in November and December, a custom pillow makes a deeply personal gift, especially for grandparents, parents, or relatives who live far away.
- Personalized Home Accents: Add a piece of your own story to your living room, bedroom, or nursery.
The real magic of a custom printed pillow is how it blends sentiment with style. It’s a practical, everyday item that’s infused with so much personal meaning, making it one of the most impactful gifts you can create.
Creating a Coordinated Gift Set
The same principles you'll learn for printing on a pillow apply directly to other personalized items. For a gift that will truly be remembered, especially for occasions like Mother's Day or the holidays, think about pairing your pillow with matching Custom Photo Blankets.
This creates a beautiful, coordinated set that doubles down on the comfort and thoughtfulness. Imagine a cozy corner with a plush blanket and a matching pillow, both showcasing a favorite family portrait—it's a gift that offers both physical warmth and the warmth of cherished memories. We'll show you how to ensure your photo quality is perfect for both.
Getting Your Image Ready for a Flawless Print
The real secret to a stunning custom pillow? It all starts with the photo. An image that looks great on your phone can sometimes turn out blurry or pixelated when it’s enlarged for print, but a little bit of prep work makes all the difference.
Taking a moment to check your photo’s specs is the single most important thing you can do. It's the foundation for turning a simple digital file into a beautiful, cherished piece of home decor.
Understanding Image Resolution
When you’re looking to print on a pillow, the term you'll hear thrown around a lot is resolution, which is usually measured in DPI (dots per inch). Think of DPI as the density of tiny ink dots the printer will lay down on the fabric. The more dots packed into every square inch, the sharper and more detailed your final image will be.
If you use a low-resolution image, it gets stretched to fit the pillow, resulting in that soft, fuzzy, or "pixelated" look. There just isn't enough digital information to fill the space cleanly.
- Minimum Goal: You should aim for at least 150 DPI at the final print size. For a standard 18x18 inch pillow, that means your image file should be around 2700x2700 pixels.
- Ideal Quality: For those truly gallery-worthy details, 300 DPI is the gold standard. This would require an image of 5400x5400 pixels for that same 18x18 pillow.
The good news? Most modern smartphones take photos well above the minimum requirement, so you're often starting from a great place. The key is to always use the original, full-size file—not a compressed version you downloaded from social media or received in a text message.
Choosing the Right File Format
Not all image files are created equal, especially when it comes to printing on textiles. You’ll mostly run into two common formats: JPEG and PNG. For photos, one is the clear winner.
JPEG (or JPG) is hands-down the best choice for photographs. It supports millions of colors and uses a smart compression method that keeps file sizes manageable without a noticeable drop in quality. It’s perfect for detailed images like family portraits or scenic vacation shots.
PNG files, on the other hand, are better suited for graphics with sharp lines and solid blocks of color, like logos or text-based designs. While you can use them for photos, they often create much larger files with no real upside for photographic printing.
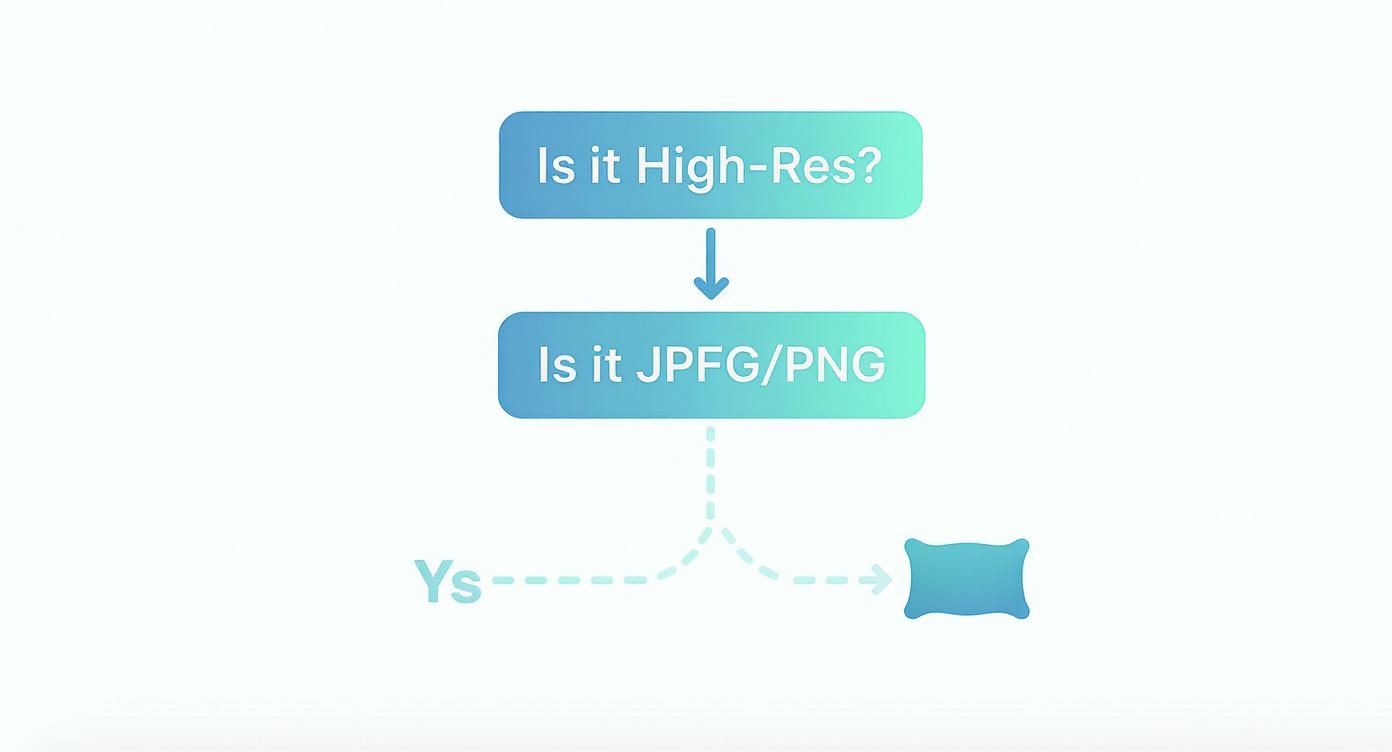
Quick Photo Checks Before You Upload
Before you hit that upload button, running through a few quick checks can dramatically improve your final print. You don’t need to be a graphic designer to do this; most basic photo editing apps on your phone or computer have these simple tools built right in.
Brightness and Contrast
Photos almost always look brighter on a backlit screen than they will when printed on fabric. Because fabric absorbs light, it can make images appear slightly darker.
- Actionable Tip: Give your photo's brightness a little nudge, increasing it by about 5-10% before you upload. This small boost helps counteract the natural darkening that happens on fabric, ensuring important details don't get lost in the shadows. A slight bump in contrast can also make the colors pop.
Cropping for the Perfect Fit
Pillows come in all sorts of shapes, from classic squares to lumbar rectangles. It’s really important to crop your image to match the dimensions of the pillow you’re ordering. This gives you total creative control, making sure the best parts of your photo are perfectly framed.
For example, if you upload a horizontal photo for a square pillow, the design tool will have to crop it for you. Doing it yourself beforehand means you get to decide what stays and what goes. This is especially important for larger items like a Custom Photo Blanket, where the layout is just as crucial as the photo quality itself. For more detailed specs, you can check out our full photo requirements guide to get every image perfectly prepared.
The growing interest in custom home decor has fueled incredible advancements in digital printing. The digital print pillow market, for instance, has seen significant growth, with the Chinese market alone experiencing an average annual growth rate of roughly 7.5% between 2018 and 2024. This global demand drives innovation, making it easier than ever to get professional results at home. Discover more insights about these market trends on hprt.com.
Once you have your desired image, you'll need to prepare it for the printing process. For machine embroidery, this often involves learning methods like these in this guide on How to Digitize Embroidery Designs. By following these simple preparation steps, you set your project up for success, guaranteeing the final pillow is a beautiful and lasting tribute to your memories.
Choosing the Right Fabric and Print Method
Once your photo is prepped and ready to go, it's time to decide on the physical canvas for your memory. The material you choose to print on a pillow is a huge deal—it will dramatically shape its final look, feel, and even how long it lasts. Think of it as the difference between a crisp, decorative piece meant for the living room couch and a soft, huggable cushion you'll want to nap on.
Just like a painter picks a canvas for its specific texture, you need to select a fabric that matches your vision. Every material takes ink a little differently, creating a totally unique result.
Exploring Popular Pillow Fabrics
The fabric's weave, texture, and what it's made of all play a role in how your photo shows up. Some materials give you a super smooth, almost photographic finish, while others have a more rustic, textured vibe.
Let's break down the most common options you'll run into.
- Polyester: This is a top pick for photo printing, and for good reason. Polyester fabrics, especially the ones with a smooth or satin-like finish, are perfect for getting those vibrant, high-definition images. The synthetic fibers are fantastic at holding color, which means you get deep blacks and bright, saturated hues that won't fade easily.
- Cotton Canvas: If you're going for a more classic, matte finish, cotton canvas is a great choice. It has a slightly textured surface that gives the final print a subtle, artistic quality. It might not be quite as punchy and vibrant as polyester, but it offers a durable and timeless look.
- Linen Blend: Aiming for a rustic or modern farmhouse aesthetic? A linen blend can be absolutely beautiful. The natural texture of the fabric peeks through the print, adding a lot of character and depth. Just a heads-up: very fine details in a photo might get a little softened by the fabric's weave.
Key Takeaway: For the most vivid, photorealistic results, you really can't beat a smooth polyester fabric. But if you're after a softer, more artistic or rustic feel, give cotton canvas or a linen blend a look.
If you really want to get into the nitty-gritty of textiles, getting some expert tips on how to choose upholstery fabric can be super helpful for understanding what makes each material tick.
Unpacking Printing Technologies
The magic that transfers your digital photo onto fabric is just as crucial as the fabric itself. Two main methods really dominate the world of custom pillow printing, and each one has its own strengths. Knowing how they work helps you appreciate the quality you're getting in the final product.
Dye-Sublimation Printing
Honestly, dye-sublimation is the gold standard for printing photos on synthetic fabrics like polyester. The process is pretty cool: it uses heat to turn solid ink directly into a gas. That gas then seeps into the fabric fibers, becoming a permanent part of the material itself rather than just sitting on top like a layer of paint.
This method gives you stunning, full-color images with incredible detail and a soft, smooth feel. And because the ink is literally infused into the fabric, the print is ridiculously durable—it won't crack, peel, or fade, even after you've washed it a bunch of times. It’s the perfect choice for pillows that are going to get a lot of love.
Direct-to-Garment (DTG) Printing
Direct-to-Garment, or DTG, works a lot like a regular inkjet printer, but it's made for fabric. It sprays specialized water-based inks directly onto the material, and the fabric absorbs the color. DTG is most effective on natural fibers like cotton and linen.
DTG can produce really detailed and colorful prints, though the vibrancy can sometimes be a touch more muted compared to what dye-sublimation can do on polyester. It’s an excellent choice when you want that soft, breathable finish on a cotton-based pillow.
As we get closer to the holiday rush in November and December, getting these details right is key to creating that perfect, heartfelt gift. And with Mother’s Day approaching in April and May, planning ahead ensures your custom pillow and Custom Photo Blankets arrive in time to celebrate mom.
This handy little visual really simplifies those first crucial checks for your image.
Ultimately, the combination of fabric and print method is what defines your pillow's final character. Whether you're making a single accent piece or a whole set of custom pillows, making a smart choice here ensures you end up with something you'll love for years.
Designing and Ordering Your Custom Pillow
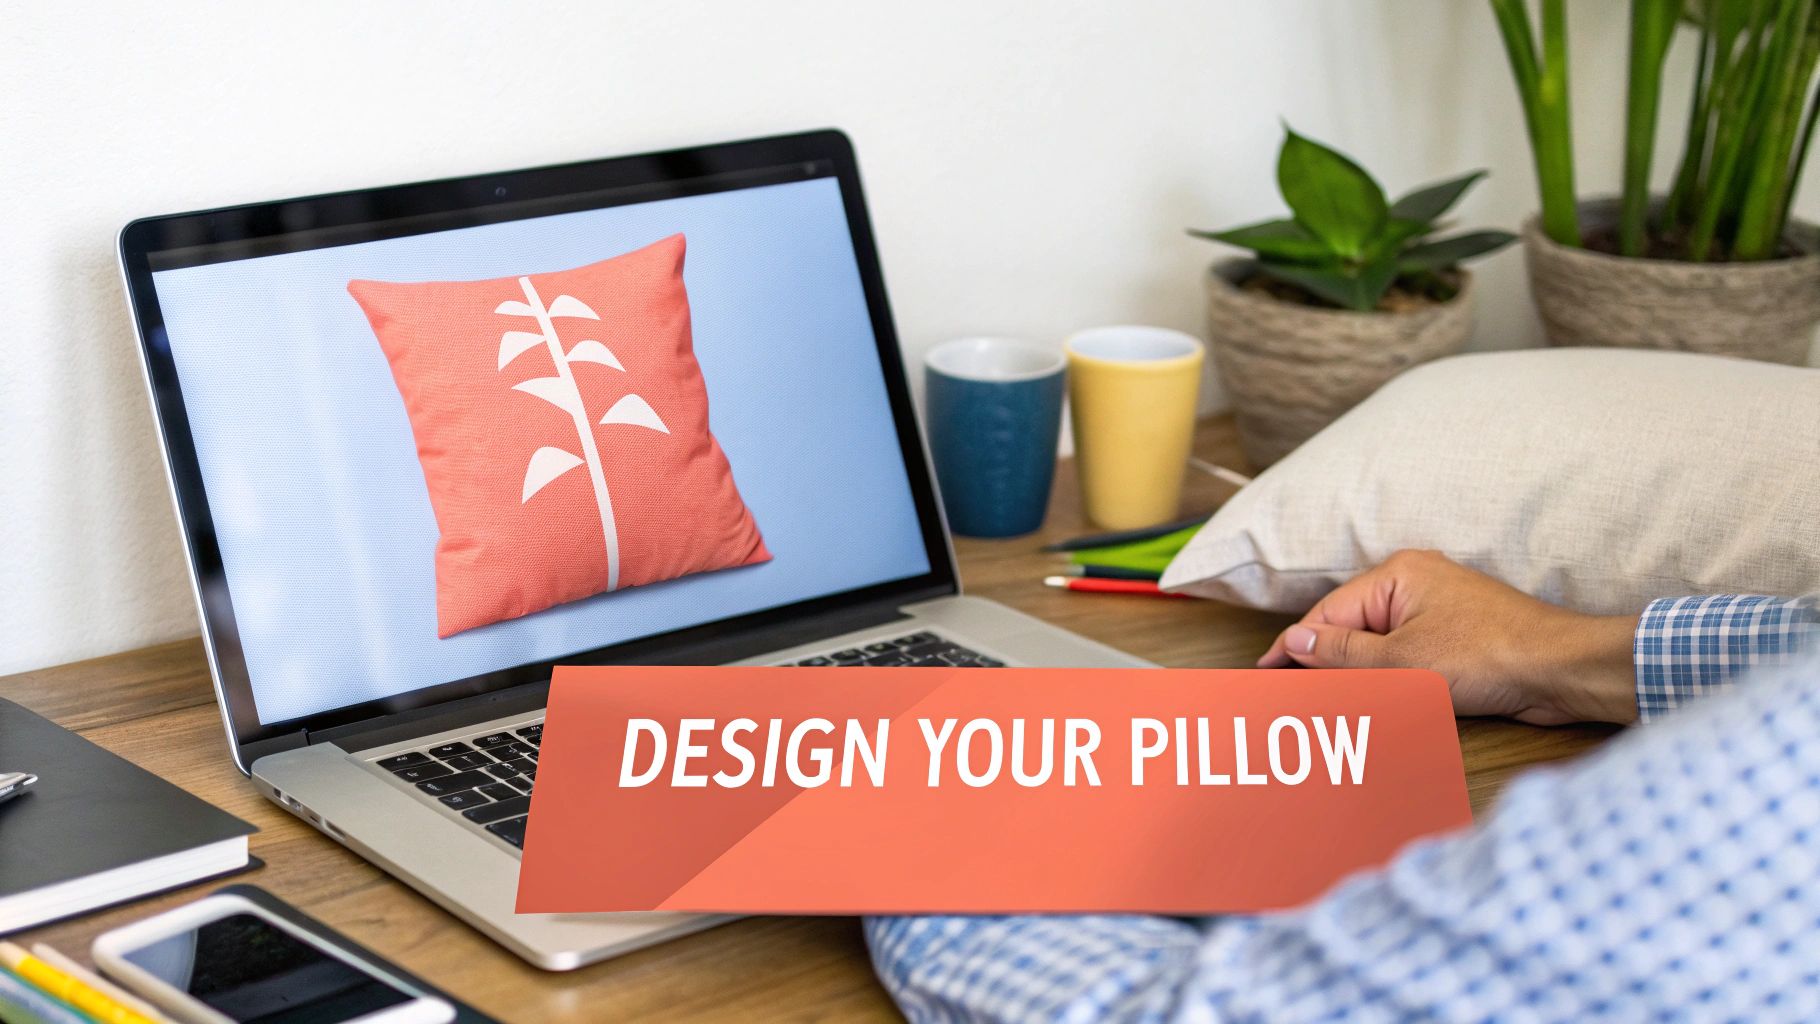
Bringing your photo from screen to snuggle-worthy pillow is where the fun really starts. Today’s online design suites have demolished the learning curve—you won’t need fancy software, just your favorite image and a clear vision.
With a few clicks, you’ll see your snapshot live on a virtual cushion. Let’s walk through how to make sure every detail lands just right before hitting “order.”
Navigating The Online Design Tool
After you choose size and fabric, you’ll find yourself in the design workspace—your digital canvas. Usually, the first thing you see is an Upload Image button. Once your high-resolution photo appears, it’s dropped onto a realistic pillow mockup so you can instantly preview placement.
From here, you’ve got full creative control:
- Drag And Drop: Shift your image around until that perfect smile or scenic view is front and center.
- Resize And Rotate: Stretch the picture to fill the pillow or scale it down for a framed effect.
- Add Personal Text: Slip in a name, date, or short message—ideal for Mother’s Day surprises or anniversaries.
Understanding The Safe Zone And Bleed Area
You’ll notice faint guide lines on the mockup. Those mark two crucial regions:
The safe zone sits in the center—keep faces, text, and key details inside this box so nothing gets trimmed off.
The bleed area extends beyond the safe zone. Let your background or edge elements fill this margin, which wraps around the seams during sewing.
Filling the bleed area is your insurance policy against white edges. Even a slight shift on the sewing table won’t compromise an edge-to-edge print.
Reviewing Your Final Mockup
Take a deep breath and zoom in for one last look before you add to cart. This digital proof is almost identical to your finished pillow.
Ask yourself:
- Is the focal point of my photo crisp and centered?
- Did I spell every word correctly in my text?
- Does the image preview look sharp, not pixelated?
- Have I extended my design fully into the bleed area?
That quick sanity check can spare you a disappointing surprise at delivery. After all, personalized decor isn’t just a trend—it’s a booming market. In 2024, the pillow industry hit USD 13.03 billion, underscoring how much people value items that feel unique. For deeper market insights, check out this 360iResearch pillow market report.
Production And Shipping Timelines
Once you approve your mockup, production typically takes 2–3 business days. After printing and sewing, it’s boxed up and sent your way.
When you’re planning a gift—especially for occasions like Mother’s Day in April and May—aim to order at least two weeks ahead. And for holiday gifting in November and December, plan to order at least three weeks ahead to account for high demand. If you’re pairing your pillow with a matching throw or Custom Photo Blankets, remember they usually follow the same 2–3 business day schedule.
Ready to dive deeper? Explore our detailed guide to personalized photo pillows for expert tips on creating the perfect keepsake.
How To Care For Your Printed Pillow
Your printed pillow isn’t just a splash of color for your couch—it holds memories worth preserving. A few simple care habits will keep your photo crisp and the fabric soft for years.
Personalized home accents are on the rise. In 2025, the global indoor throw pillow market is estimated at USD 1.5 billion, with a projected 4.5% CAGR through 2033. Learn more about pillow market forecasts on Data Insights Market.
- Gentle machine cycles in cold water reduce friction and fading.
- Use mild detergents without optical brighteners to protect ink.
- Air-dry flat to avoid distortions and heat damage on both fabric and print.
These steps make a big difference in maintaining color and texture.
Spot Cleaning Tips
Small spills are inevitable—spot cleaning is your go-to for quick fixes. Lightly blot the stain with a soft cloth dipped in a gentle soap solution. Always let the spot air-dry completely before fluffing or using again.
Washing Guidelines
Most printed pillow covers can handle a gentle wash, but it’s smart to double-check the manufacturer’s care label first. Stick to cold water and pH-neutral detergents to lock in color and prevent shrinking.
- Never use bleach or fabric softeners—they break down fibers.
- Turn covers inside out when possible to shield the image.
- Opt for detergents labeled for delicate fabrics only.
Key takeaway
Cooler temperatures and gentle cleansers are essential to keep your print looking fresh.
Drying And Wrinkle Care
Heat is the enemy of printed pillows. Air-drying is safest and helps keep the ink from cracking over time.
- Remove excess water by pressing the pillow between clean towels.
- Gently reshape it to its original dimensions.
- Let it dry flat at room temperature, away from direct sunlight.
For minor wrinkles, use a cool iron on the reverse side—just enough to smooth out creases without touching the print directly.
Storage And Rotation Tips
When the seasons change, pack away your pillows to prevent dust and moisture build-up. Store them in breathable cotton bags or linen totes—avoid plastic, which can trap humidity. Rotating your pillows every quarter ensures even wear and keeps them looking freshly plumped.
Pillow Fluff And Replacement
Fluffing isn’t just about looks—it redistributes the fill, restores volume, and prolongs the life of your pillow. Over time, natural compression happens, so give each pillow a quick massage weekly. If you notice fading or fabric stiffness despite proper care, it might be time to order a new printed cover and revive your décor.
Enjoy your keepsake-quality pillow for years to come.
Common Questions About Printing on Pillows
Printing photos on pillows often raises big questions—from resolution to fabric choice. Before you order, you want real-world answers, not jargon. Here’s a concise FAQ that delivers practical advice.
- What resolution guarantees a crisp print?
- Can I use social media images without loss?
- Which fabric captures the most detail?
- How do I match on-fabric colors to what I see on screen?
- What if I’m pairing a pillow with a custom photo blanket?
Choosing The Best Photo Resolution
Aiming for 150 DPI at the pillow’s finished size usually gives smooth, clear prints. On an 18×18 inch pillow that works out to 2700×2700 pixels. If you want extra sharpness, double your goal to 300 DPI (that’s 5400×5400 px).
Pro Tip: Higher DPI packs more data into each square inch, so details stay crisp.
Most modern phones shoot well over 12 megapixels, making it easy to hit these numbers. Simply open your photo in any image viewer and check its pixel dimensions.
Using Original Files Instead Of Social Media Downloads
Social platforms like Instagram and Facebook compress photos heavily, leading to artifacts and faded colors. Screenshots or downloaded images often lack the resolution you need.
Stick to the original files from your camera or phone. This is vital if you want a pillow that perfectly matches a custom photo blanket.
- Save in full-quality or RAW format when possible
- Avoid screenshots and low-quality exports
- Organize file names so originals are easy to locate
Selecting Fabrics That Maximize Detail
Fabric choice has a huge impact on print clarity. Tightly woven polyester with a satin finish shows the finest details thanks to dye-sublimation, which embeds ink into the fibers.
- Polyester (Satin): Permanent, vivid prints
- Cotton Canvas: Matte, artistic look, softer detail
- Linen Blend: Textured feel, may blur very fine lines
If your design includes tiny text or intricate patterns, lean on polyester for the best results. Match the fabric to the printing method your provider recommends.
Ensuring Color Accuracy On Fabric
On-screen colors are backlit and often brighter than what you’ll get on fabric. Convert your images to sRGB to give printers a consistent color profile.
Always review the digital proof before final approval. Even with calibrated printers, fabrics can absorb ink unevenly—plan for about a 5% drop in brightness.
Heads Up: Slight hue shifts are normal. If you need bolder colors, adjust saturation by a few percent.
Case Study: From Muted To Magnificent
A designer once printed a dreamy sunset photo only to see those fiery oranges turn to rust. The culprit? An unconverted JPEG. After switching to sRGB and boosting saturation by 8%, the second proof nailed the original look.
Managing Bleed Areas And Safe Zones
Every upload interface includes guides that show where seams and trim will fall. Stay mindful of:
- Safe Zone: The central area where faces and text remain intact
- Bleed Area: Extra space around edges—extend backgrounds here to dodge white borders
Use the proof preview to confirm nothing important is too close to the cut line. It only takes a quick glance to avoid wasted prints.
Troubleshooting Common Print Issues
Even careful prep can hit snags. Here’s how to recover:
- Blurry Edges? Recheck your DPI and resubmit a higher-resolution file.
- Color Shifts? Confirm your image is in sRGB and review the digital proof.
- Cropped Details? Pull elements further into the safe zone.
Ordering a small fabric swatch first can help you catch these issues early.
When To Reach Support
If color or cropping problems persist, contact your printer before final approval. A quick call or chat can clarify file specs and save you from a disappointing batch.
Preparing Files For Custom Photo Blankets
Planning a pillow-and-blanket duo? Consistency is crucial. Use the identical original image, keep your resolution and sRGB profile uniform, and examine both proofs side by side. That way, your gifts look perfectly coordinated.
Final Tips And Expert Insight
Clear file names prevent mix-ups. A convention like BeachSunset_2700x2700_300DPI.jpg speaks volumes at a glance. And whenever possible, order a small 4×4 inch fabric sample. A quick test reveal surprises in color or texture long before full production.
Ready To Create Photos That Pop On Fabric
With these insights in hand, you can move forward with confidence. Nail your file prep, pick the right fabric, and give that proof a thorough review. Before you know it, you’ll be holding a pillow that looks as sharp and vibrant as the original photo.
Craving a coordinated pillow and blanket set? Make your memories tangible today with That Blanket Co—order now and enjoy premium quality photo prints that last. Visit That Blanket Co