


Heart Photo Collage: Design, Sizing, and Upload Tips
You've gathered favorite family photos on your phone and want to turn them into a heart-shaped keepsake. The pictures look bright and clear on screen, but you're not sure how they'll look once they're cropped, arranged, and printed on a blanket. A little planning before you upload can help you choose a layout, protect important details, and avoid a finished design that looks fuzzy from across the room.
What a Heart Photo Collage Actually Is
A heart photo collage arranges multiple pictures within a heart-shaped design. Depending on the layout, the photos might overlap, fit into a tidy grid, or be cropped together so they form one continuous image. The shape gives the collage an immediate emotional tone, while the photographs make it personal.
The heart is a familiar symbol, but it didn't always mean romantic love. Heart-shaped forms appear in ancient Greek and Roman art as botanical designs, often representing leaves rather than the anatomical heart or affection. The oldest-known image resembling the familiar heart shape dates to approximately 510–490 BCE, while an unambiguous example of the recognizable two-lobed icon is commonly dated to 1344. The symbol became associated with courtly love and devotion later, then grew widely popular across Europe by the 16th century (Harvard Art Museums' history of the heart symbol).
That history helps explain why the shape communicates affection so quickly, even though it doesn't look like a human heart. Valentine's Day helped make it a mass-market visual language, appearing on cards and other gifts associated with romantic love (TED Ideas' account of the heart and Valentine's Day). A collage uses that familiar signal to frame images of couples, children, parents, grandparents, friends, or pets.
Think of a grandparent opening a blanket with photos of the family arranged into one clear heart. The gift could mark a birthday, an anniversary, a wedding, or a memorial. The same idea can also suit a pet keepsake or a collection of parent-child memories. Custom Photo Blankets combine the collage with a useful home item, so the design can live on a sofa or bed rather than being seen only on a special occasion.
Before choosing pictures, decide what the collage should say. A focused collection of wedding memories will feel different from a family tribute, even if both use the same heart outline. The practical choices that follow, from image quality to print size, will help the design look as thoughtful in fabric as it does on your screen.
Preparing Your Photos Before You Upload
A photo can look crisp on a phone and still print softly. A screen displays a small image at a comfortable size, and it may smooth out limitations that become visible when the image is enlarged or cropped. Start with the original camera files when possible, not screenshots or copies downloaded from social media, which may have been compressed.
Check the source and the subject
Make a folder of candidate photos before opening the design tool. Keep images where faces are in focus, the subject has some breathing room around them, and the lighting makes facial details easy to see. Set aside heavily filtered shots, dim photos with visible grain, and pictures where a face is already cut off at the edge. If you have several nearly identical pictures of the same moment, choose the sharpest one rather than using all of them.
File type matters less than the actual image quality, but the original file is usually the safest starting point. JPEG photos are common and often suitable for printing; avoid repeatedly saving them through apps that may reduce quality. If a design tool accepts a full-resolution image file, use that rather than a thumbnail or preview.
For a useful refresher on photographing flat artwork without glare or distortion, this Famous Movie Posters photography guide offers practical advice on capturing clear images. The same attention to focus, lighting, and straight framing helps when you're preparing photographs for a keepsake.
Estimate resolution after the crop
The key question isn't just how many pixels the original photo has. It's how many remain in the portion that will show inside the heart. Effective PPI, or pixels per inch, is the retained pixel width divided by the printed width in inches. A practical target for close-viewed photographic output is about 300 PPI; 200–220 PPI may still look acceptable on a larger piece viewed farther away, while dropping below roughly 150 PPI increases the risk of visible pixelation (WhiteWall's print-quality guide).
For example, a heart region printed 12 inches wide needs about 3,600 retained pixels across to reach 300 PPI. At 20 inches wide, it needs about 6,000 retained pixels. These are checks on the cropped portion, not the photo's full dimensions.
Before-upload check: Confirm each photo has a clear subject, enough space around faces, and enough retained pixels for the intended print. A crop can remove useful resolution, just as cutting a small picture out of a larger page leaves less detail to enlarge.
Mixed portrait and horizontal photos don't need to match. They do need to be positioned so the important subject survives the crop. Preview the smallest image in the intended design: if a face is hard to recognize at the size it'll occupy on the blanket, swap in a closer, sharper image.
Heart Layout Options Worth Trying First
Three layout families cover most heart collages. Each makes a different promise: intimacy, order, or an informal patchwork. Choose based on the photos and the mood you want, not just the number of images you have.
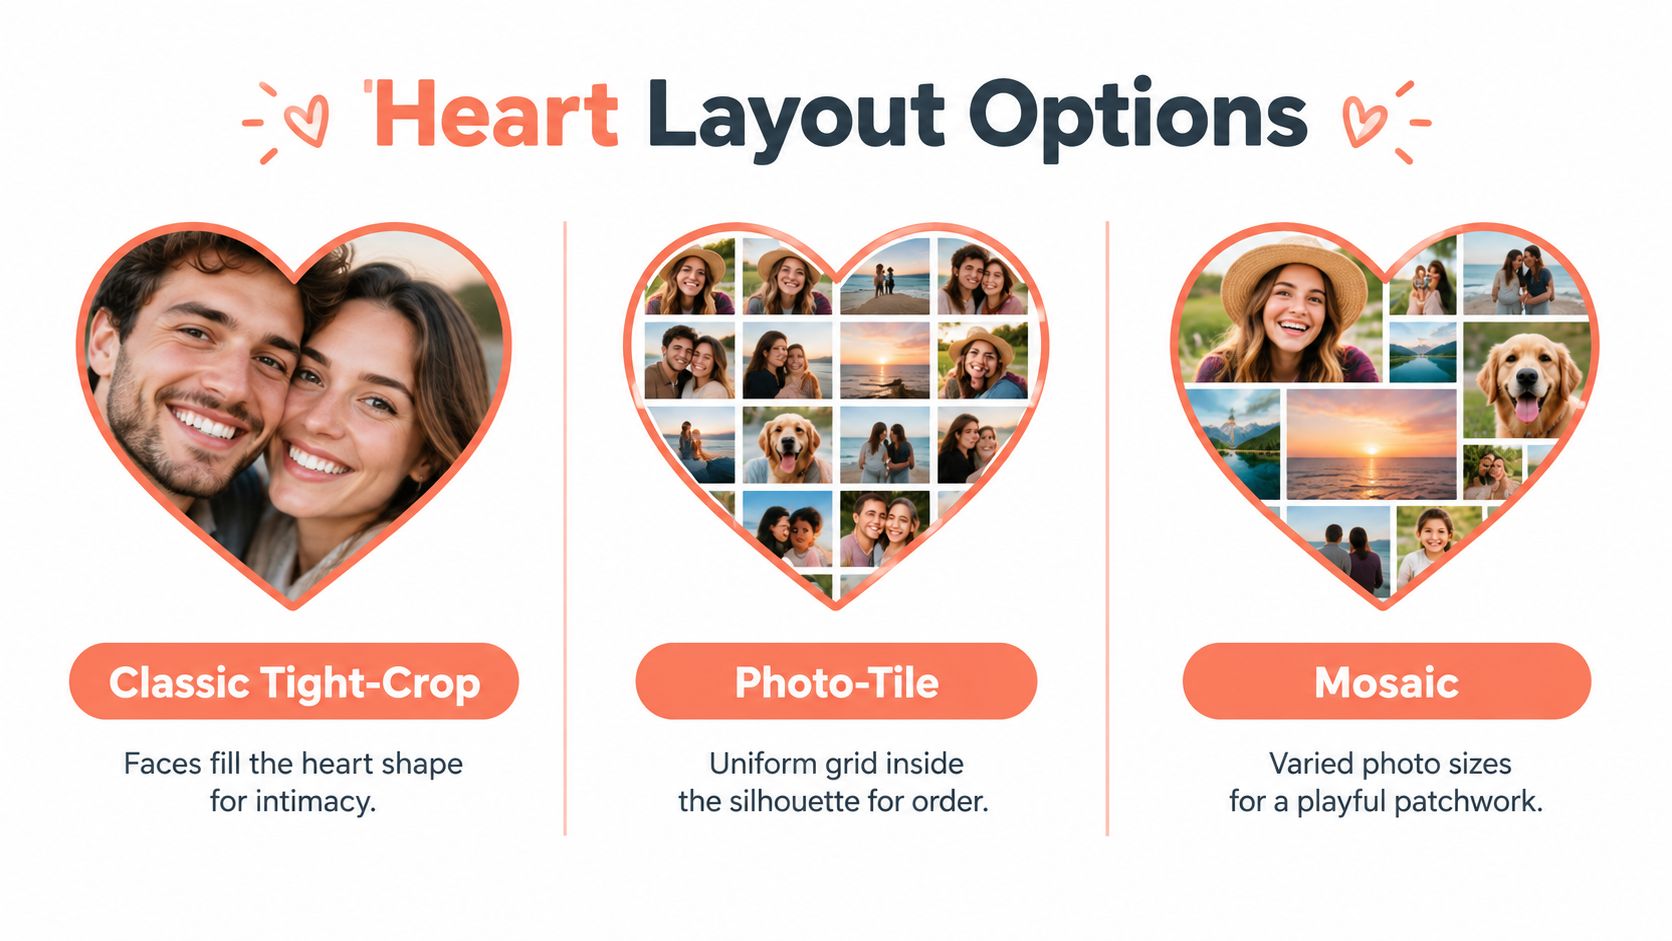
A classic tight-crop heart blends photos closely into the silhouette. It can feel intimate and expressive, especially when the pictures share a subject or a similar color mood. The trade-off is that tight crops can hide faces near the edge or make unrelated backgrounds compete. Leave room around each subject before applying the heart mask.
A photo-tile heart puts separate images into a regular grid within the outline. Its tidy structure works well for family portraits, a set of moments from one celebration, or images you want viewers to scan individually. Keep the gaps between tiles consistent. If a tile near the edge cuts through a face or the grid makes the outer contour hard to recognize, adjust the crop or simplify the arrangement.
A mosaic heart uses photos of different sizes, with larger images drawing attention and smaller ones filling around them. It suits a collection with one clear favorite image and supporting moments. It can also become visually busy: avoid placing several bright backgrounds side by side, and don't scatter tiny faces evenly throughout the design. Reserve the larger spaces for the images that matter most.
For more ways to structure multiple images before settling on a heart, explore these photo collage layout ideas.
Heart Layout Options at a Glance
| Layout | Best For | Watch Out For |
|---|---|---|
| Classic Tight-Crop | Close, emotionally connected moments | Faces clipped by the outline or crops that feel crowded |
| Photo-Tile | Orderly collections where each image should be distinct | Uneven gaps and edge tiles that weaken the heart shape |
| Mosaic | A focal photo surrounded by supporting memories | Competing backgrounds and small, hard-to-recognize faces |
A composition should read as a heart from across the room, with individual pictures still understandable up close. Check the outer contour, the spacing between images, and where each important subject lands. If a key face touches the heart boundary, move or replace the photo before you commit.
Sizing the Collage for Throw Twin or Queen
Choose the finished blanket size before arranging the photos. A layout that looks balanced on a small preview may need different crops when printed larger, and the viewing distance affects how much detail people expect to see. A Throw is often viewed at close range, so sharp faces and careful cropping matter. A Queen may be seen from farther away, which can make a slightly lower effective PPI acceptable, but it doesn't make a blurry source image sharp.
| Size | Typical Print Width | Suggested Photo Count | Target PPI |
|---|---|---|---|
| Throw | Confirm the product's finished dimensions | Use fewer, larger images for close viewing | Aim for about 300 PPI |
| Twin | Confirm the product's finished dimensions | Use a moderate set that keeps faces recognizable | Aim for about 300 PPI; assess 200–220 PPI for farther viewing |
| Queen | Confirm the product's finished dimensions | Allow more images only if each remains legible | Aim for about 300 PPI; assess 200–220 PPI for farther viewing |
Photo-count ranges depend on the design tool, tile size, and the photographs themselves, so don't treat a fixed number as a quality guarantee. A useful first test is to build the heart with the images you consider essential, then add supporting photos only while faces remain easy to recognize. If the smallest faces turn into dots, fewer images will usually make a stronger keepsake.
For the exact dimensions available for your chosen product, check this blanket size guide before you begin. Then calculate PPI using the pixels left after each image's crop, not the original file width. For example, a heart region 12 inches wide needs about 3,600 retained pixels across at 300 PPI; a 20-inch region needs about 6,000 pixels (WhiteWall's print-quality guide).
A size table can help you plan, but the final check is the design preview at the product's actual proportions. If a photo only works when enlarged beyond its available detail, replace it or give it a smaller role. A Custom Photo Blanket with fewer crisp images can preserve expressions better than one packed with every picture you've collected.
Export and Upload Settings That Actually Matter
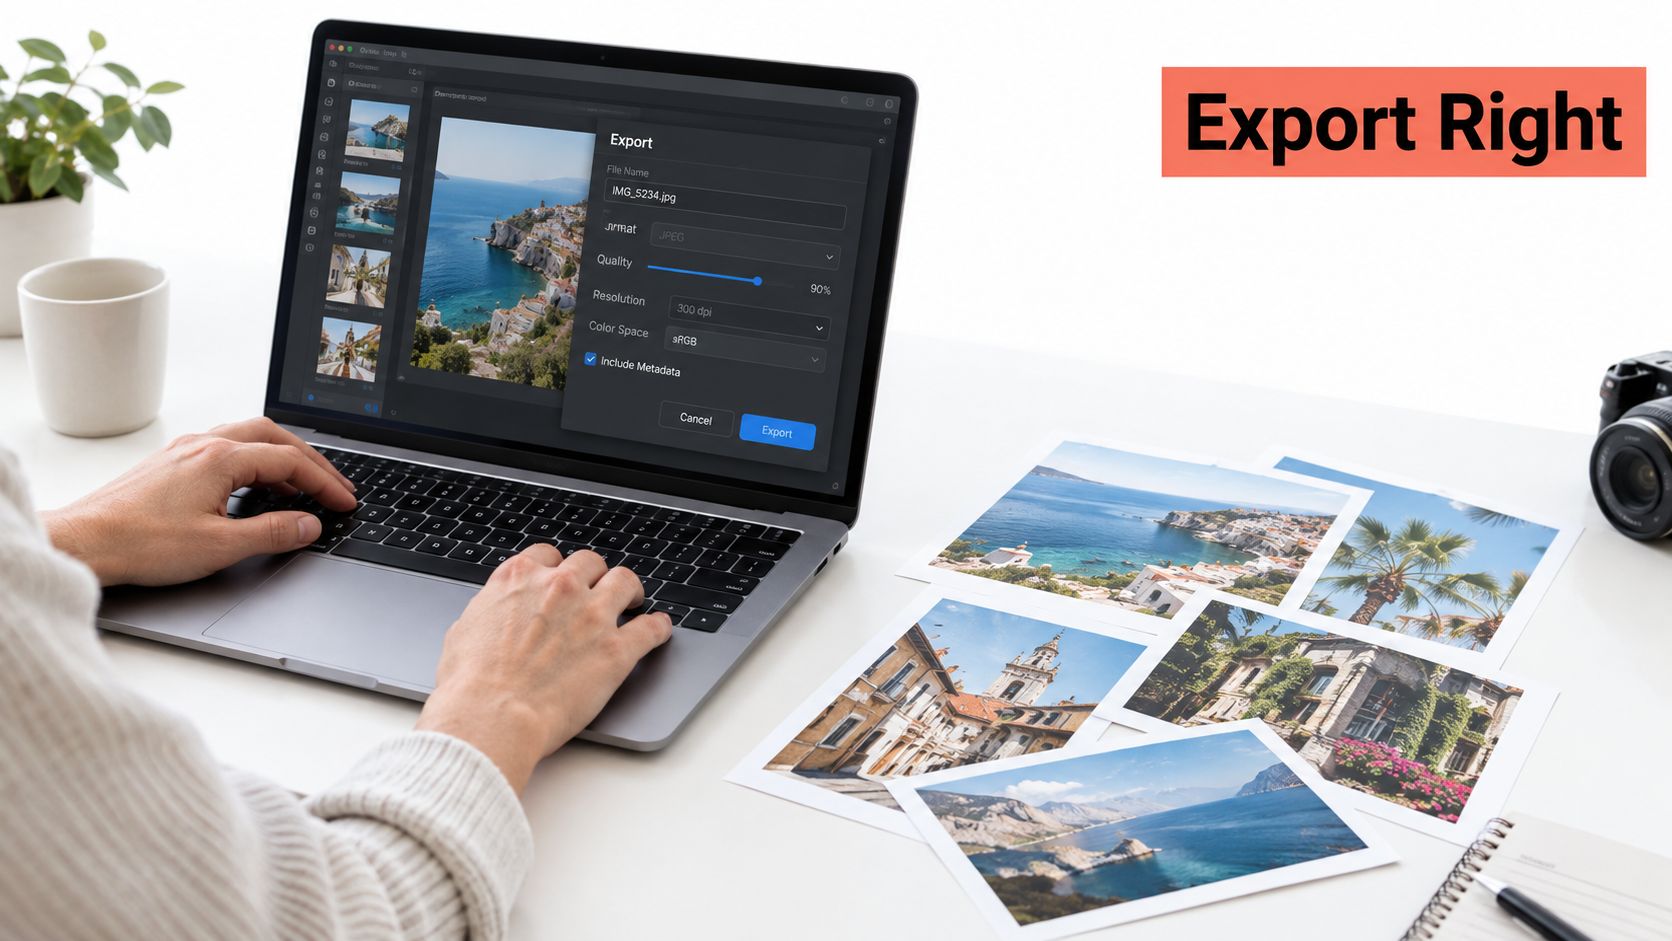
The export is the handoff between your design and the printed fabric. Keep the canvas matched to the product's proportions, export at the highest quality the tool allows, and avoid enlarging a small image to fill a large space. 300 PPI is a useful close-viewed print target, but check the effective resolution after cropping rather than assuming an export setting can restore missing detail (WhiteWall's image-quality guidance).
Match the canvas and color
Start by choosing the blanket size, then set the canvas to the same proportions. If the aspect ratios don't match, the final image may be cropped or stretched. Check that the heart has enough breathing room around its edges so the design doesn't feel cramped when printed.
Color can shift between screens and fabric. RGB is the usual color mode for screens, while print workflows may use other profiles; converting between them can change how some hues appear. Don't assume a bright screen color will print identically. Review the preview for muddy shadows, overly saturated backgrounds, and pale details that may blend into the fabric.
Clear file names make it easier to upload the right version. Use names such as “family-heart-final” and “family-heart-proof,” and keep the original photos in a separate folder. If you're comparing a keepsake with a framed-photo display, this guide to coastal shell frames offers another example of how presentation choices can shape a photo gift.
Proof at the size people will see
Before checkout, inspect the design at 100% output scale if your editor supports it. Look closely at faces near the perimeter, the smallest tiles, the heart's point and lobes, and any overlap between photos. Enlargement can make a low-resolution image look bigger, but it can't bring back detail that wasn't captured; for a deeper explanation of print sharpness, review this guide to photo resolution for printing.
Use this final proofing checklist:
- Crop: No important face or pet feature is cut by the heart mask.
- Shape: The outer contour reads clearly and isn't interrupted by stray photos.
- Color: Adjacent images don't create distracting clashes or muddy-looking areas.
- Detail: Small faces remain recognizable at the intended viewing distance.
- File: The correct final version, not an earlier draft, is selected for upload.
If the on-site preview lets you reposition photos, make those adjustments before ordering. A few careful checks can catch problems that a small thumbnail hides.
Smart Gifting Moments and Final Design Tips
A heart collage suits a gift that tells a story, whether the story is about a couple, a family, or a beloved pet. In November and December, frame the design as a holiday keepsake for a partner, parent, grandparent, or family household. The National Retail Federation defines the U.S. holiday shopping season as November 1 through December 31 and forecast 2025 sales of $1.01 trillion to $1.02 trillion, with year-over-year growth of 3.7% to 4.2% (NRF's 2025 holiday sales forecast). Custom Photo Blankets can fit that seasonal context as a personal gift that also brings warmth to the home.
April and May are a natural time to build a heart around family or children's photographs for Mother's Day. In its 2025 survey, the NRF found that 84% of U.S. adults expected to celebrate, and celebrators planned to spend an average of $259.04 on gifts and related activities (NRF's Mother's Day survey findings). Online shopping was the most commonly reported purchasing channel in that survey, with 36% planning to shop online (Mother's Day channel figures). That makes a photo-based keepsake a practical choice for family members who need to order remotely.
For weddings and wedding anniversaries, choose images that capture people and moments the recipient will want to revisit. A guide to bridal party gift ideas can help you think about the occasion and the people involved, while the collage itself can focus on a favorite portrait and supporting memories. For a family or pet gift, choose photos that will still feel at home in everyday décor, not only on a holiday.
A concise design check
- Photos: Use original, sharp files and remove near-duplicates.
- Layout: Choose a tight crop, tile grid, or mosaic based on the pictures' role.
- Size: Confirm product dimensions, then check effective PPI after cropping.
- Focal point: Give the most meaningful image enough space to stay recognizable.
- Proof: Inspect the outline, faces, spacing, and color in the upload preview.
More photos don't automatically make a collage more personal. A small group of clear, meaningful images can feel warmer and remain easier to enjoy than a crowded heart where every face is tiny. Before ordering, ask yourself whether the recipient would display the finished design year-round. If the answer is yes, you've likely found the right balance between sentiment and everyday use.
That Blanket Co offers customizable photo blankets in throw, twin, and queen sizes, with collage designs that let you arrange favorite images into a heart-shaped keepsake. Choose your photos, review the design, and visit That Blanket Co to create a blanket for someone you love.