


How to Make Collage Art on Canvas Your Definitive Guide
So, you want to create a collage on canvas? It’s a fantastic way to bring together different elements—paper, fabric, photos—into one cohesive piece of art. At its core, it's about picking a good surface, gathering your favorite bits and pieces, figuring out a layout you love, and then sticking everything down with the right adhesive.
Let's get into the nitty-gritty of what you'll need to make it happen.
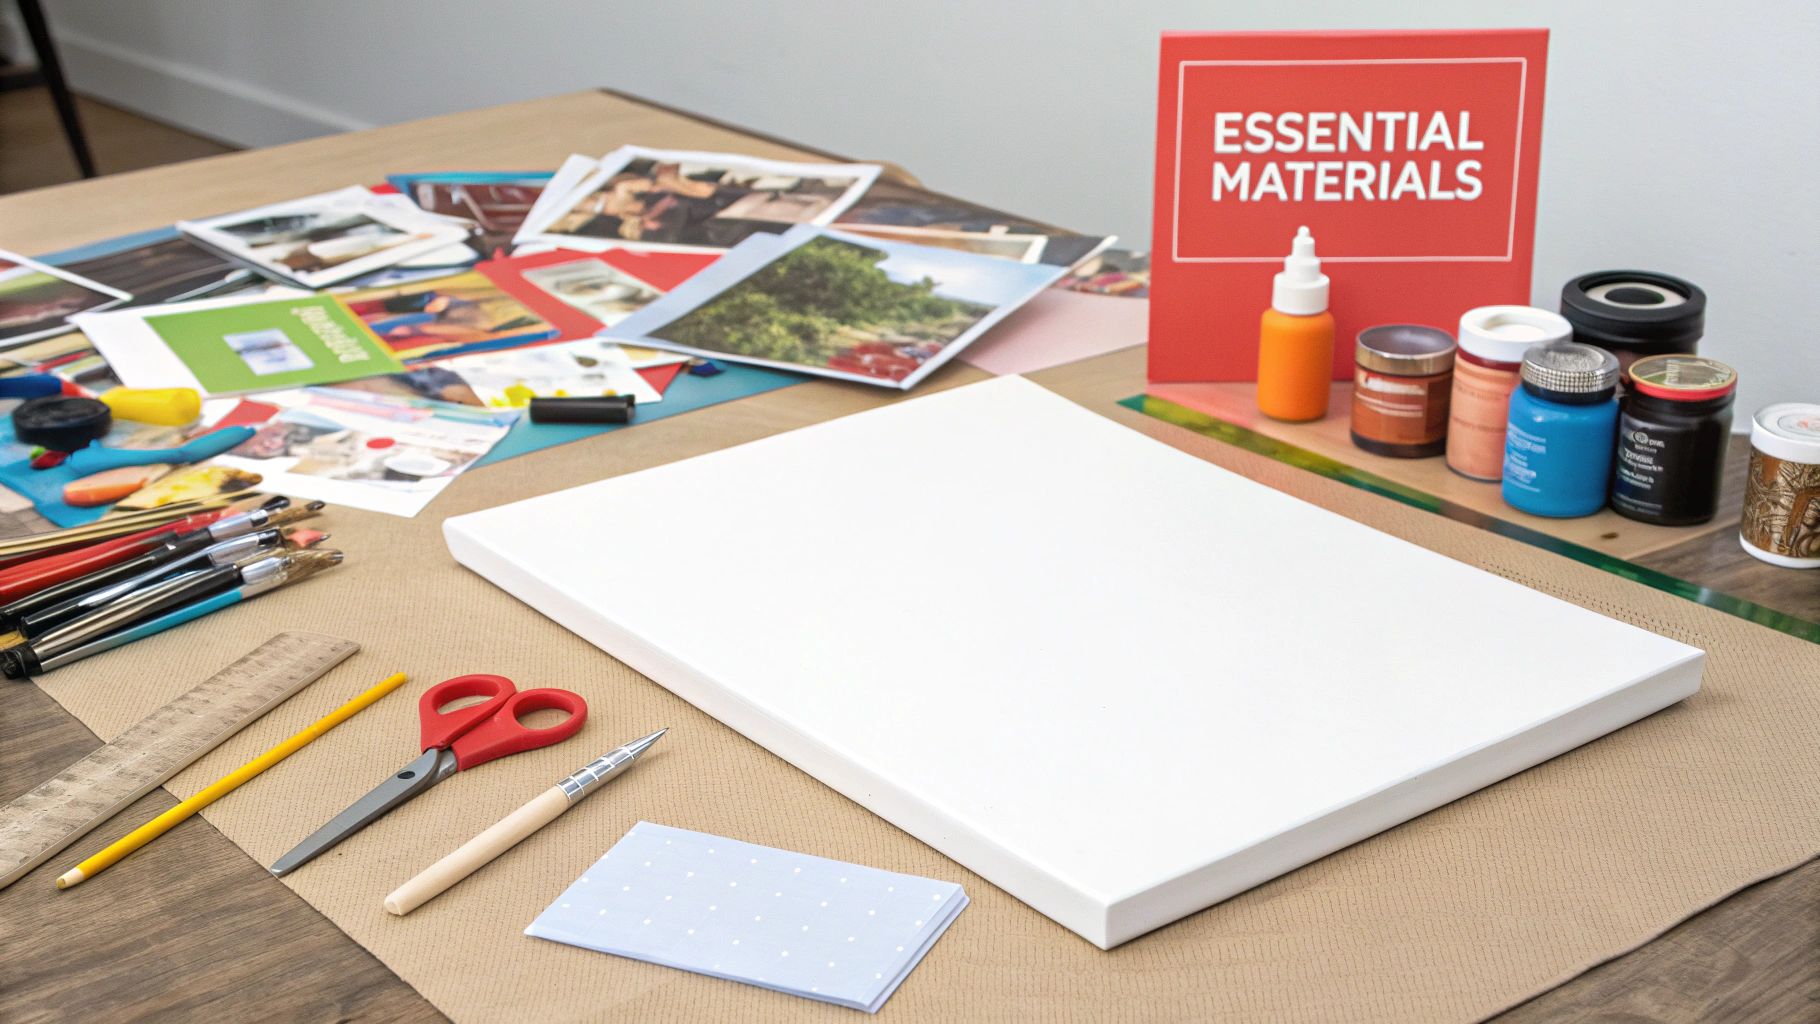
Gathering Your Essential Collage Materials
Before you even think about gluing anything down, let’s talk tools. Getting your materials together first makes the whole creative process so much smoother. The quality of your supplies really does make a difference, not just in how the final piece looks, but in how much fun you have making it.
You don't need a professional studio setup. The beauty of collage is how accessible it is, and you probably have some of these things lying around the house already. But a few smart choices will give your artwork that polished, lasting look.
Selecting Your Canvas Foundation
Everything starts with your base—the canvas. This is the stage where your creation will come to life. You’ve got two main options here, and each one has its own vibe.
- Stretched Canvas: This is what most people picture when they think of a canvas. It's fabric (usually cotton or linen) stretched over a simple wooden frame. They're lightweight, ready to hang right away, and give your art that classic, gallery-style feel.
- Canvas Boards: These are a bit more rigid. They're made from canvas that’s been glued onto a firm board. I find they’re great for beginners or smaller projects because they're less expensive, super easy to store, and don't warp as easily.
A little pro-tip: some artists even use existing high-quality canvas prints as a starting point. They can provide an interesting textured background, or you can even cut them up for unique collage elements.
Finding Your Creative Elements
Now for the fun part! This is where you get to let your personality shine. You can use pretty much anything in a collage. The idea is to gather a mix of textures, colors, and subjects that mean something to you.
Go beyond the usual magazine cutouts. Think about old letters, ticket stubs, scraps of fabric, or pressed flowers. A truly great collage tells a story, and the pieces you choose are the words you use to tell it.
A successful collage often feels like a curated collection of memories and inspirations. Don't be afraid to mix high-art elements with everyday scraps—the contrast is what creates interest.
This visual gives a great breakdown of the three main supply categories you'll be working with.
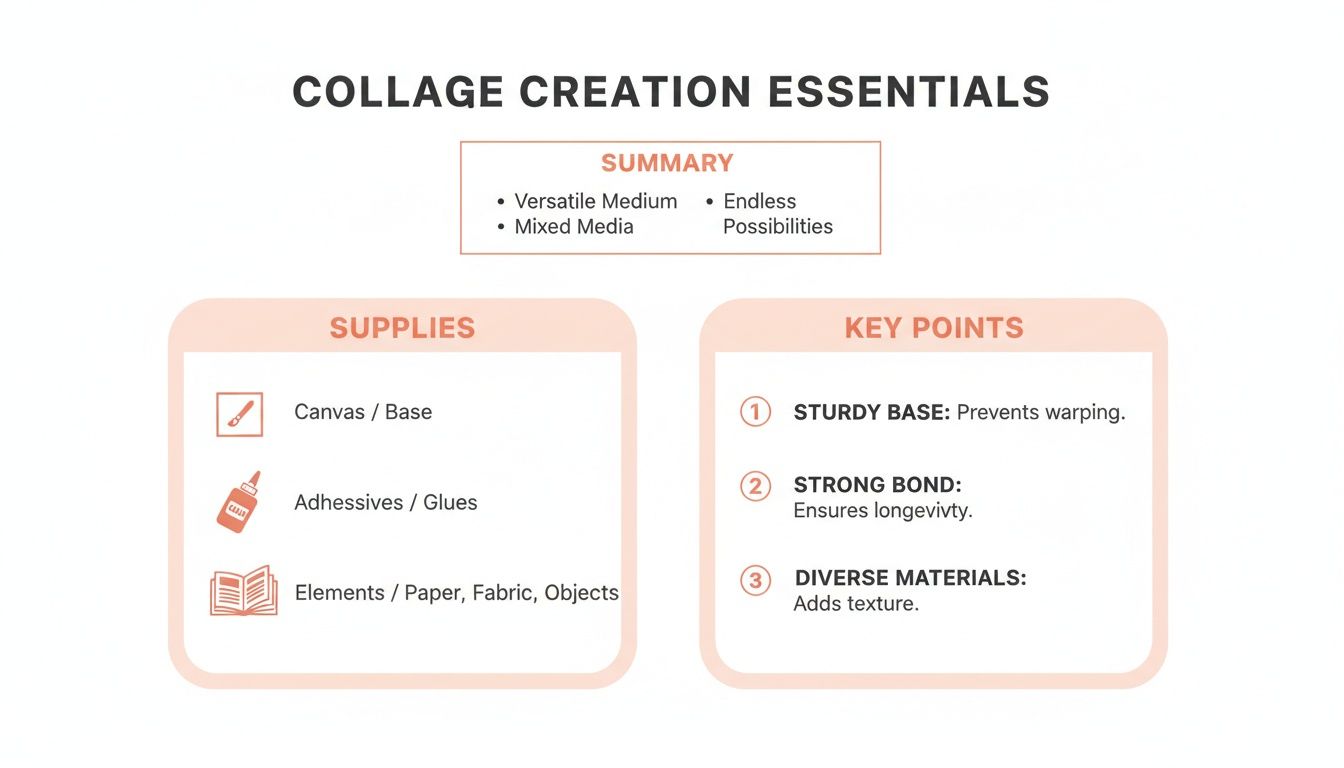
As you can see, your project really hinges on having a solid base (your canvas), a dependable adhesive, and a collection of elements that you genuinely love.
Choosing the Right Adhesive
The glue you pick is more important than you might think. It’s not just holding your art together; it also acts as a sealant and determines the final finish.
Deciding on an adhesive can be tricky since each one gives a different result. Here’s a quick rundown to help you choose the right one for your specific project.
Choosing the Right Adhesive for Your Canvas Collage
| Adhesive Type | Best For | Finish Options | Key Feature |
|---|---|---|---|
| Mod Podge | All-purpose paper and fabric collage | Matte, Satin, Gloss | Acts as both a glue and a sealant. Dries fast. |
| Acrylic Gel Medium | Mixed media, heavier items, creating texture | Matte, Semi-Gloss, Gloss | Adds body and transparency. Very strong bond. |
| PVA Glue | Simple paper collage, kid-friendly projects | Dries Clear (Matte) | Inexpensive and non-toxic. Easy to clean up. |
| Spray Adhesive | Large, flat paper elements without wrinkles | Invisible | Provides an even, thin coat. No brush marks. |
Ultimately, your choice depends on the materials you're using and the final look you're going for. I personally lean towards acrylic gel medium for most of my canvas work because of its strength and versatility.
And one last thing—if you're using your own photos, make sure they're printed at a good resolution. There's nothing worse than a blurry, pixelated image ruining an otherwise beautiful collage. If you need some pointers, learning about the best photo resolution for printing is a great place to start. It’ll ensure your memories look sharp and clear.
Once you have all your materials laid out, you're officially ready to start composing your masterpiece.
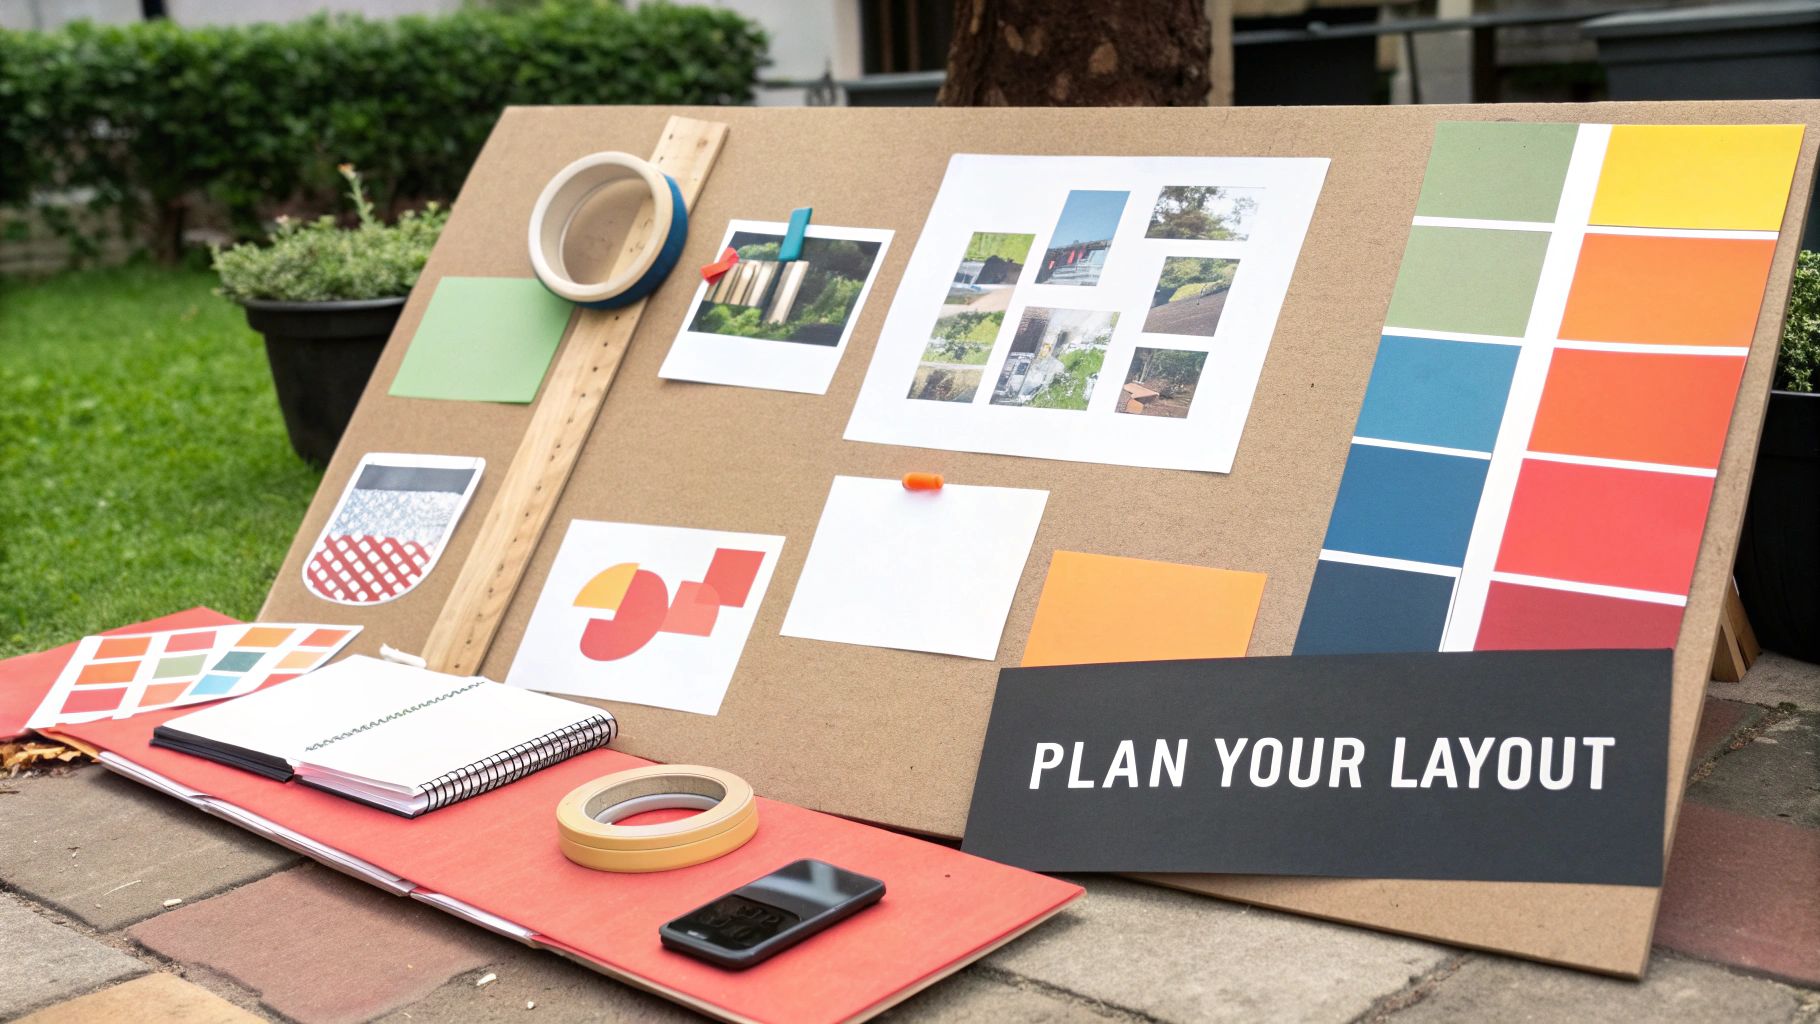
Bringing Your Vision to Life: Planning a Great Composition
Okay, you've gathered all your materials. Now for the fun part—actually planning your piece. A truly great collage does more than just look cool; it tells a story. This is the stage where you move from a pile of interesting bits and pieces to a thoughtful layout before you even think about picking up the glue.
First, think about the overall theme or feeling you're going for. Are you trying to capture the chaotic energy of a city trip? The peaceful vibe of a garden? Maybe you're creating something nostalgic with old family photos. Nailing down your theme will be your north star, guiding every choice you make about color, texture, and where to place things.
Building Your Layout
Before you commit to anything permanent, always do a "dry run." Just lay your canvas on a table or the floor and start playing with your pieces. This is your chance to experiment without any pressure.
Move your elements around, see how they look when they overlap, and get a feel for how they interact. This process helps you find your focal point—that one key element that immediately grabs the viewer's attention. I find it works best to position your most powerful piece slightly off-center; it creates a more dynamic and interesting path for the eye to follow.
Here’s a little trick I’ve picked up: start by placing your largest element on the canvas first. Once that’s down, you can arrange the smaller pieces around it. It anchors the whole composition and makes filling in the rest of the space feel much less intimidating.
Once you land on an arrangement you love, grab your phone and snap a quick picture. This becomes your roadmap when it's time to glue everything down, so you’re not just trying to remember where everything went. This kind of visual planning is key for any project, and if you’re working with photos, you can find similar tips on how to create a compelling photo collage.
Creating Balance and Flow
A well-composed piece feels balanced, but "balanced" doesn't have to mean perfectly symmetrical. Think about it in terms of visual weight. A big, dark object on one side of the canvas can be balanced out by a small cluster of bright, detailed items on the other.
You also want to consider how someone's eye will travel across the canvas. You can actually guide their journey by creating lines and pathways with the edges of your paper or fabric.
- Color Harmony: To keep things from looking chaotic, try sticking to a limited palette of three to five main colors. This will instantly make your piece feel more cohesive.
- Vary Your Shapes: Mix big, bold shapes with smaller, more intricate ones. That contrast adds a ton of visual interest and complexity.
- Embrace Negative Space: Don't feel like you have to cover every single inch of the canvas! A little empty space gives your key elements room to breathe and makes them stand out more.
If you want to see a masterclass in composition using simple shapes and bold color, I highly recommend you explore the iconic cut-out techniques of Henri Matisse. His work is pure genius. By taking the time to thoughtfully arrange your pieces, you’ll transform a simple collection of scraps into a genuinely compelling work of art.
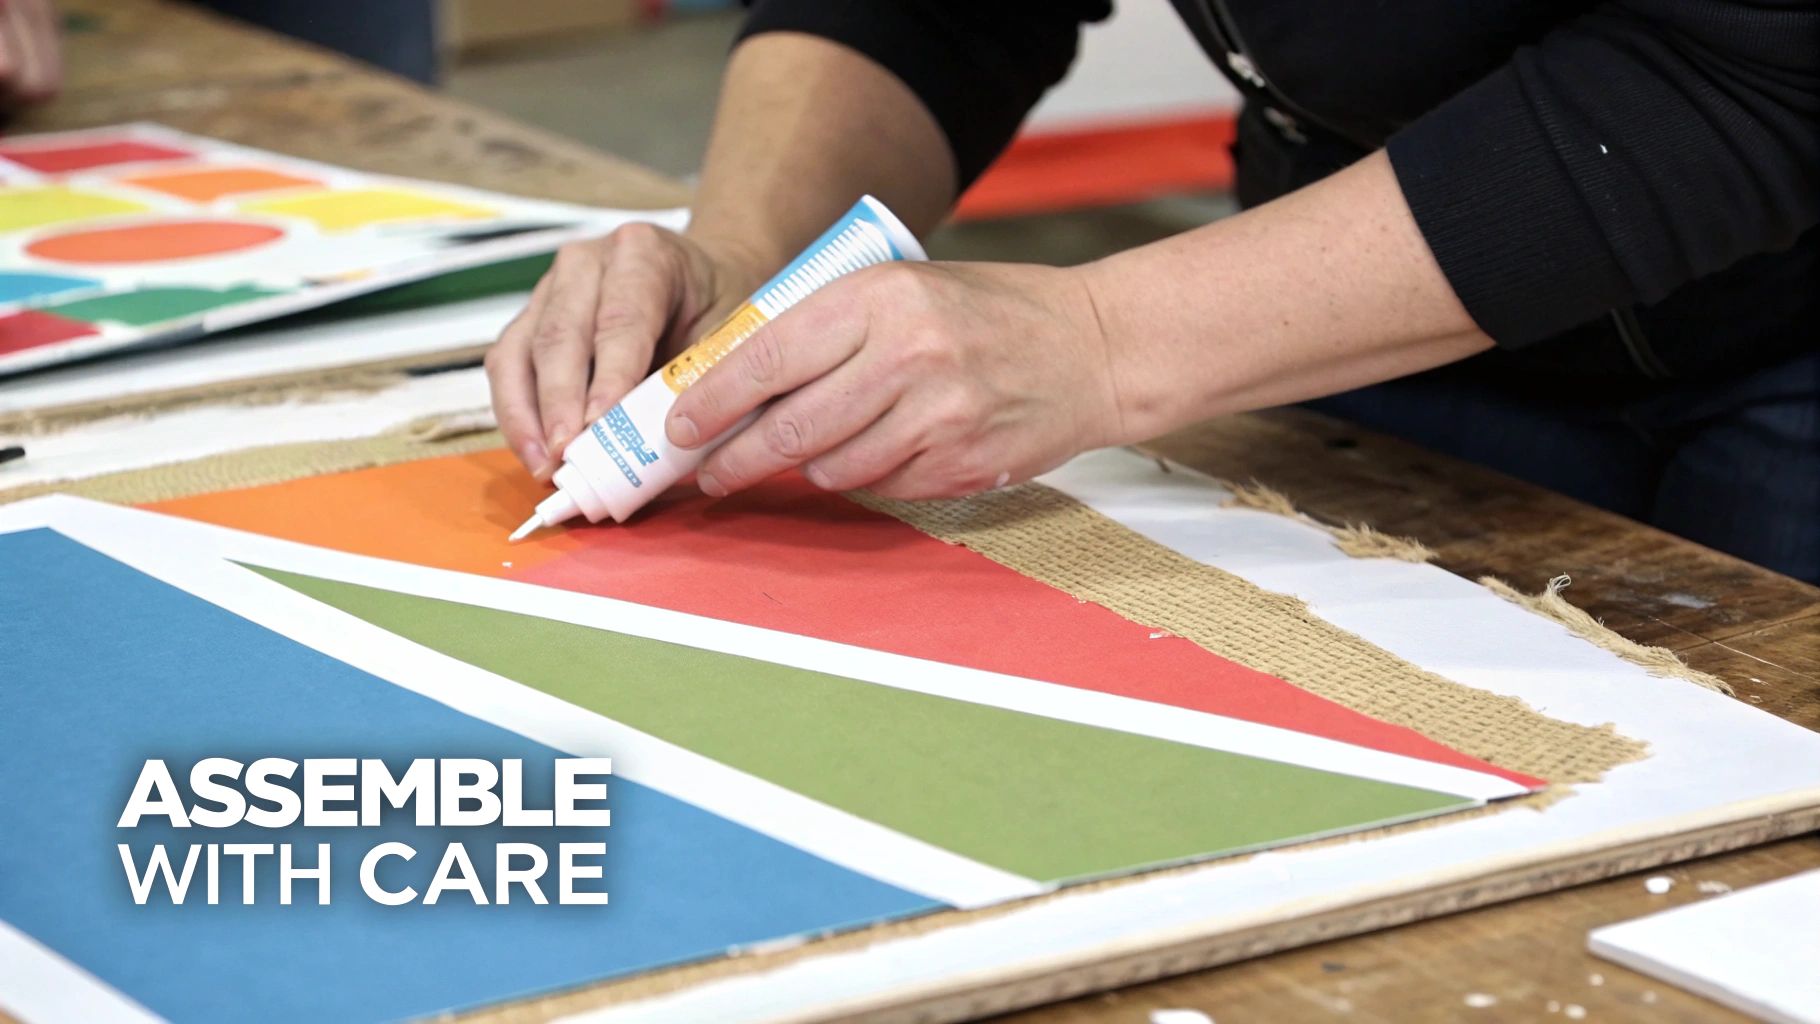
Applying Your Materials with Proven Techniques
Once you've mapped out your composition, it's time to bring your collage to life. This is the magical part—the hands-on process where all your ideas and materials finally come together on the canvas. It’s about more than just gluing things down; it’s about using the right techniques to build layers, create texture, and make something that will last.
First things first: prep your canvas. While you can work on a raw canvas, I always recommend priming it for a much better result. A thin, even coat of gesso creates a smooth, non-porous foundation. This stops your adhesives from soaking into the fabric, keeping your colors brighter and giving you more control.
Another great option is to paint the canvas with acrylics. This creates a vibrant, colorful background before you even place your first piece, adding another layer of depth. A painted background can unify your entire composition, especially if you let little bits of the color peek through your collage elements.
Adhering Different Types of Materials
Not all collage materials are created equal, so they shouldn't be glued down the same way. The real trick is matching your adhesive to the material's weight and texture.
For delicate items like tissue paper or magazine pages, wrinkles are your biggest enemy. To keep things smooth, apply a thin layer of your medium (like Mod Podge or gel medium) directly onto the canvas. Carefully lay the paper down and use a brayer or an old gift card to smooth it from the center out, pushing out any air bubbles as you go.
Heavier elements demand a much stronger bond. For things like:
- Fabric scraps
- Buttons or beads
- Thick cardstock
- Small wooden pieces
You'll want to use a generous amount of acrylic gel medium. It has a much thicker consistency and provides the heavy-duty hold needed to secure three-dimensional items for good.
Tearing vs. Cutting for Different Effects
How you shape your paper elements can completely change the mood of your artwork. Neither method is better than the other—they just give you different vibes.
| Technique | Edge Effect | Best For |
|---|---|---|
| Cutting | Creates clean, sharp, and precise lines. | Geometric designs, modern aesthetics, or isolating a specific image without a distracting background. |
| Tearing | Produces soft, feathered, and organic edges. | Vintage or rustic looks, blending layers together seamlessly, and adding texture. |
I almost always use a combination of both in a single piece. The contrast between sharp, cut edges and soft, torn ones adds a wonderful dynamic tension to the final artwork.
This hands-on process connects you to a rich artistic history. Art historians trace modern collage back to around 1912, when Pablo Picasso and Georges Braque started gluing bits of newspaper onto their canvases. As the art world embraces digital imagery, trend data shows a huge swing back toward "irreplicable artistry," with collage leading the way. You can discover more insights about the 2026 art market trends on Saatchi Art.
Building Depth Through Layering
Layering is what transforms a flat collection of images into a dynamic, interesting piece. It’s a core skill for anyone learning how to make collage art on canvas. Start by applying your largest background elements first, then build forward from there.
A simple rule of thumb for effective layering is "thin to thick." Place your flattest, thinnest papers down first, and add bulkier, more textured items on top. This not only makes adhesion easier but also creates a natural sense of depth.
Think about transparency and opacity, too. A piece of vellum or translucent fabric layered over a photograph can create a dreamy, ethereal effect. In contrast, placing a bold, opaque shape on top will make it pop right off the canvas. Keep experimenting—move pieces around, see how they interact, and don't glue anything permanently until you love how it looks. It's this careful construction of layers that gives your canvas collage its unique story.
Sealing and Protecting Your Finished Artwork
You’ve spent all this time carefully arranging and gluing every perfect piece. Now it's time for the final, crucial step: protecting your creation. Sealing your canvas collage isn't just about making it last; it’s the finishing touch that magically transforms your project from a bunch of separate parts into a single, cohesive work of art.
A good top coat does more than you might think. It shields your artwork from dust, moisture, and the fading effects of UV light. Plus, it unifies all the different sheens and textures you’ve used—from glossy magazine cutouts to matte fabric scraps—giving the entire surface a consistent, professional look.
Choosing Your Ideal Sealant
The sealant you pick will have a big impact on the final look and feel of your collage. There are two main ways to apply it, and each one is suited for different kinds of projects.
- Brush-On Mediums: Products like Mod Podge or acrylic varnishes are my go-to for most projects. You apply them with a soft-bristle brush, which gives you fantastic control and lets you really work the sealant into textured surfaces for a solid bond. Just brush on a thin, even coat, first in one direction and then the other, to keep streaks at bay.
- Spray Sealants: An aerosol varnish is a lifesaver for delicate collages, especially those with 3D elements that a brush might knock loose. For the best results, take it outside or to a well-ventilated space and apply several light coats. Let each layer dry completely before adding the next one. This method helps you avoid drips and get that perfectly even coverage.
Don't rush this stage. Your collage needs to be 100% dry before you even think about sealing it. Applying a top coat to glue that's still damp can cause cloudiness or smearing, which can undo all your hard work in an instant.
Selecting the Perfect Finish
Once you've decided how you'll apply the sealant, you need to pick a finish. This choice is purely about aesthetics and really depends on the style you're going for.
| Finish Type | Visual Effect | Best For |
|---|---|---|
| Matte | A non-reflective, flat finish that cuts down on glare. | Creating a soft, modern, or vintage vibe where your textures can really stand out. |
| Satin | A subtle, low-lustre sheen that's a nice middle ground between matte and gloss. | An elegant, versatile finish that makes colors a bit richer without being overly shiny. |
| Glossy | A highly reflective, shiny finish that makes colors pop. | Achieving a vibrant, photo-like quality and a durable, slick surface. |
After your final sealant coat feels dry to the touch, you can go ahead and add any last-minute dimensional bits, like buttons or beads, using a strong craft glue. Then comes the hardest part: waiting for it to cure. Let your artwork sit undisturbed for at least 24-72 hours so everything can fully harden.
This final step ensures your piece is ready to be displayed proudly or given as a heartfelt holiday gift. The care you put into creating a collage is the same thoughtfulness that goes into other personalized presents, like designing Custom Photo Blankets, where cherished memories are woven into a warm, functional keepsake perfect for the holiday season.
Now for the Fun Part: Displaying and Gifting Your Creation
You did it. Your masterpiece is sealed, cured, and ready for its debut. This is the best part of the process—sharing your art. A handmade canvas collage is so much more than a craft project; it's a statement piece, a conversation starter, and a tangible collection of memories you poured your creativity into. Let's find the perfect way to show it off.
Sometimes, the simplest approach is best. A single, well-placed collage can absolutely command attention on a mantelpiece, perched above a desk, or sitting on a floating shelf. This works especially well for larger canvases or pieces with bold, vibrant compositions that deserve to be the star of the room.
Creating a Personal Gallery Wall
Another fantastic option is to make your collage the anchor of a personal gallery wall. This is a super popular design choice that lets you mix your handmade art with framed photos, prints, and other meaningful objects. A gallery wall tells a broader story, and your collage can serve as its heart.
To pull off a cohesive look, here are a few tips I've picked up along the way:
- Start Big: Place your collage (which is likely the largest piece) slightly off-center. This anchors the collection without totally dominating it.
- Balance Your Layout: Arrange the other pieces around your collage, mixing horizontal and vertical orientations to keep the display feeling dynamic and alive.
- Watch Your Spacing: Try to keep a consistent gap of about 2-3 inches between each frame. It gives the whole arrangement a clean, intentional feel.
For even more inspiration, check out our guide on creative ways to display photos—a lot of the same principles apply here.
The Art of a Truly Thoughtful Gift
Handmade collage art on canvas makes for an incredibly heartfelt gift. The time and thought you put into picking and arranging every single element transform it into a deeply personal present, perfect for holidays like Christmas, or even anniversaries. You’re not just giving a piece of art; you’re giving a curated story.
This idea of thoughtful curation is actually part of a bigger trend. The same hands-on approach you used to make your canvas collage is now influencing how people personalize their home decor, moving from walls to soft furnishings. Brands are taking this collage logic and applying it to textiles—instead of gluing images, customers can upload photos into digital templates that get printed directly onto fabric. You can see how these design trends are evolving on Kittl.com.
It’s a cool evolution of the same concept. The care you took choosing photos for your canvas can be used to design Custom Photo Blankets, turning cherished moments into a warm, functional keepsake. It’s a wonderful way to bring that same creative vision into a comforting gift that can be used and loved every single day, especially during the cozy holiday months.
Common Questions About Making Collage Art on Canvas
Even when you have a plan, a few questions always seem to pop up once you start creating. Getting clear answers to these common hang-ups can make your collage project feel much smoother and way more fun. Let’s tackle some of the most frequent queries I hear so you can keep your creative momentum going.
What Is the Best Glue for Collage on Canvas?
For most of your paper and photo elements, you can’t go wrong with an acid-free PVA glue or a dedicated decoupage medium like Mod Podge. They give you a solid bond and can even double as a sealant.
But what if you're getting more adventurous with heavier, three-dimensional items? Think fabric, buttons, wood pieces, or beads. In that case, a strong acrylic gel medium is your best friend. It offers a much more powerful hold and won’t buckle under the weight, making sure your more textured pieces stay exactly where you put them.
How Do I Stop Paper from Wrinkling?
Ah, the dreaded wrinkles and bubbles. It’s a classic collage frustration, but trust me, it’s completely preventable. The secret is all in your application technique.
Instead of slathering adhesive onto your delicate paper, brush a thin, even layer of glue directly onto the canvas. Carefully lay the paper down and immediately smooth it out, starting from the center and working your way to the edges. You can use your fingers, a small brayer, or even a stiff piece of card (an old gift card works wonders!). This simple motion pushes out any trapped air before it has a chance to form a bubble.
Can I Paint Over My Collage?
Absolutely! Painting over parts of your collage is a fantastic way to unify all the different elements and add another layer of artistic depth. Acrylic paints are perfect for this.
You could apply a transparent wash of color to gently tint certain areas, or use opaque paint to introduce new patterns and details right on top. The most important rule? Always make sure your adhesive is completely dry before you pick up a paintbrush. Some artists I know even apply a clear isolation coat first, which creates a helpful barrier between the collage and the new layer of paint.
While they sound similar, collage and mixed media aren't exactly the same. Collage is specifically art made by adhering materials like paper or fabric. Mixed media is a much broader term for any artwork that uses more than one medium. So, every collage is a mixed media piece, but not every mixed media piece is a collage.
This kind of project is all about bringing personal memories to life and turning photos into art. That same creative spark can be used to design other unique keepsakes that you can hold onto.
At That Blanket Co, you can transform your favorite photos into beautiful, ultra-soft Custom Photo Blankets. It’s the perfect way to turn cherished moments into a warm, comforting gift that can be enjoyed every day. Explore our collection and start designing your personalized blanket today!